


Soldering is a skill that can save a guitarist a lot of money. With just a simple soldering iron I have been able to swap pickups, change out pots and switches, and make my own patch cables. Each one of those things used to mean a trip to my local guitar store that would cost me money. In this article I’m going to walk you through what I do to make patch cables. This is a great way to save money as you can buy high end cabling and really solid plugs for a fraction of the cost of pre-made cables or solder less patch cable kits (let me be clear that I’m not bashing pre-made cables or solder less kits, I just want to show you ways to learn new skills and save money and you get to decide what you want to do).

For the purpose of this article I am using some Mogami 2319 cable and pancake plugs, but you can use whatever type of cable and plugs you like. I’m also using a standard-duty Weller soldering iron, a quite affordable model from my local hardware store. Here is a picture of everything I use for making cables, much of this being very low cost or even things I already had at home.
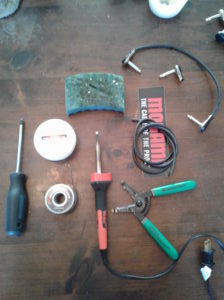 Basic soldering tool list:
- Soldering Iron (I prefer to use flat tips on mine)
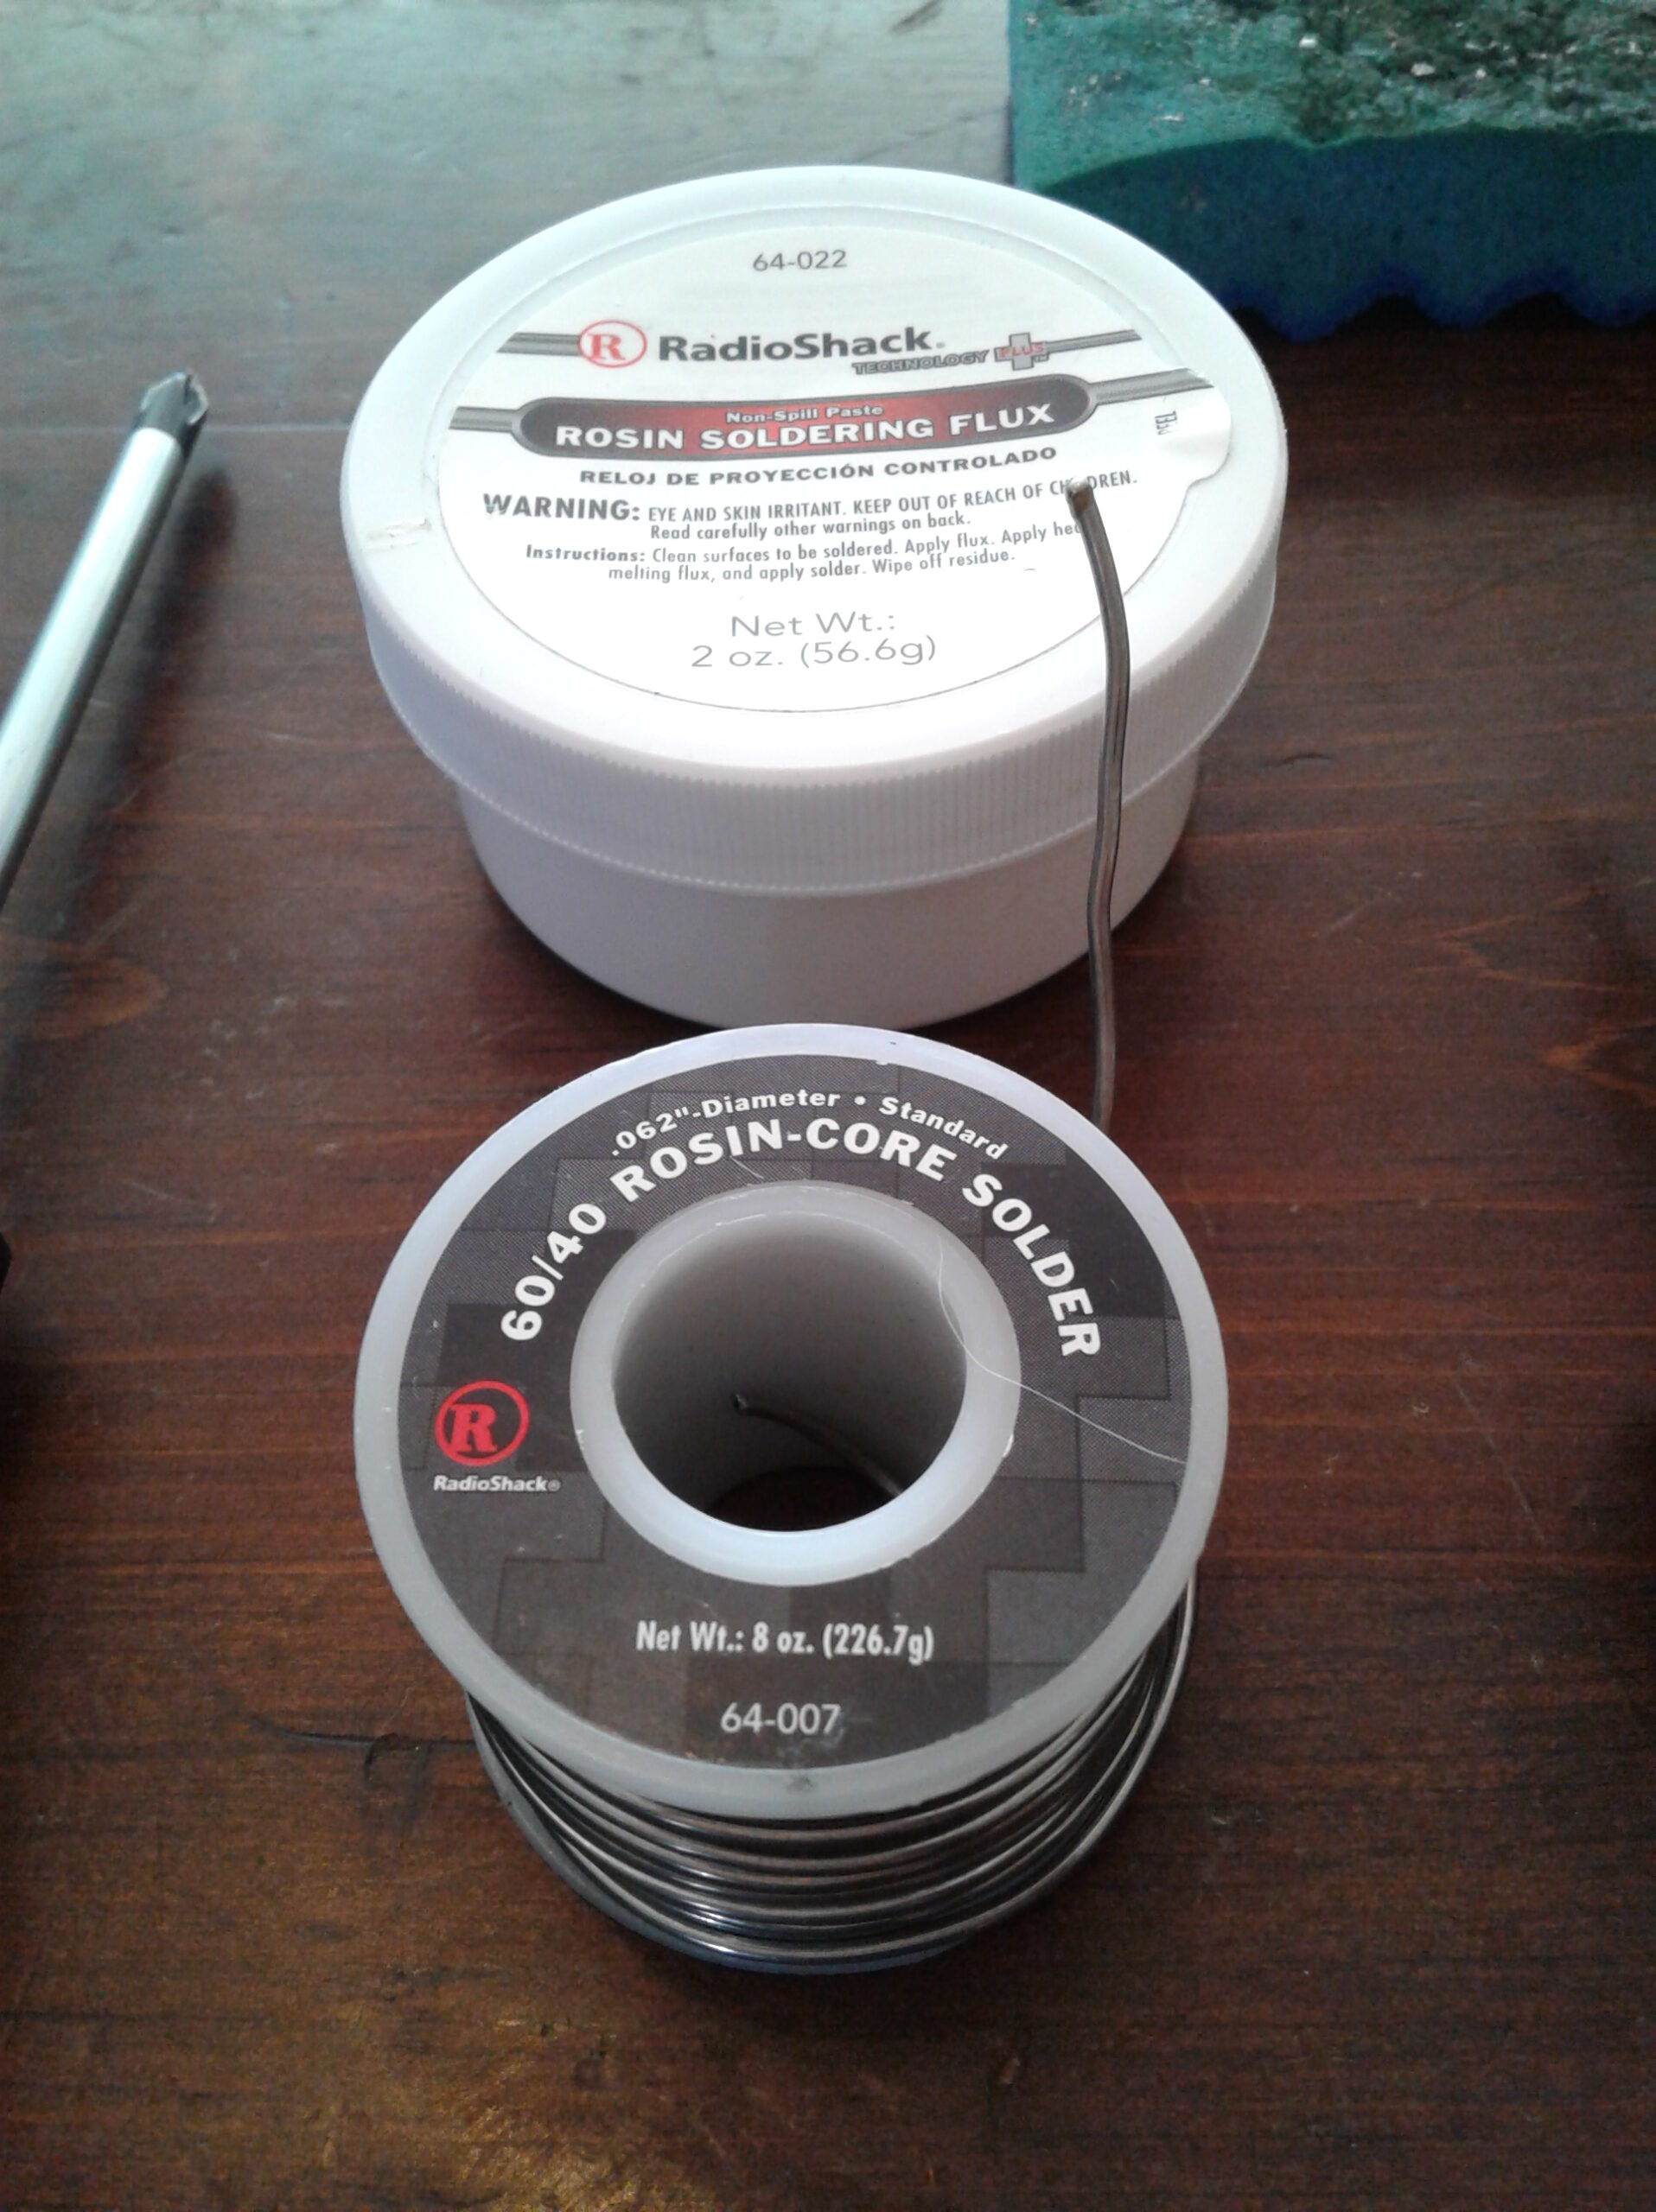
- Solder (I use 60/40 Rosin-Core)
- Rosin Soldering Flux
- Wire cutters/strippers
- Damp Sponge or Tip Cleaning Wire (for cleaning soldering iron)
- Cable of choice
- Plug of choice
- Screw driver(s) for opening up pancake plug covers
- Heat Shrink (optional and totally a preference thing. Most of the time I prefer to use it to help protect my cable)
The Prep Work
Once you have all your tools gathered it’s time to prep for soldering. In itself soldering is a quick procedure so I recommend getting everything ready to go up front. Plug in that soldering iron and let it warm up while you do these things.
First I like to prepare the cable itself. Grab your wire strippers and carefully strip back the outside layer of rubber from the cable. You want to try to do this without damaging the wires at all. I typically line up the cable against my plug to determine how much I need to strip back. The outer wire that is exposed will be the ground wire. Pull all the ground wire to one side and twist it into one thick strand.
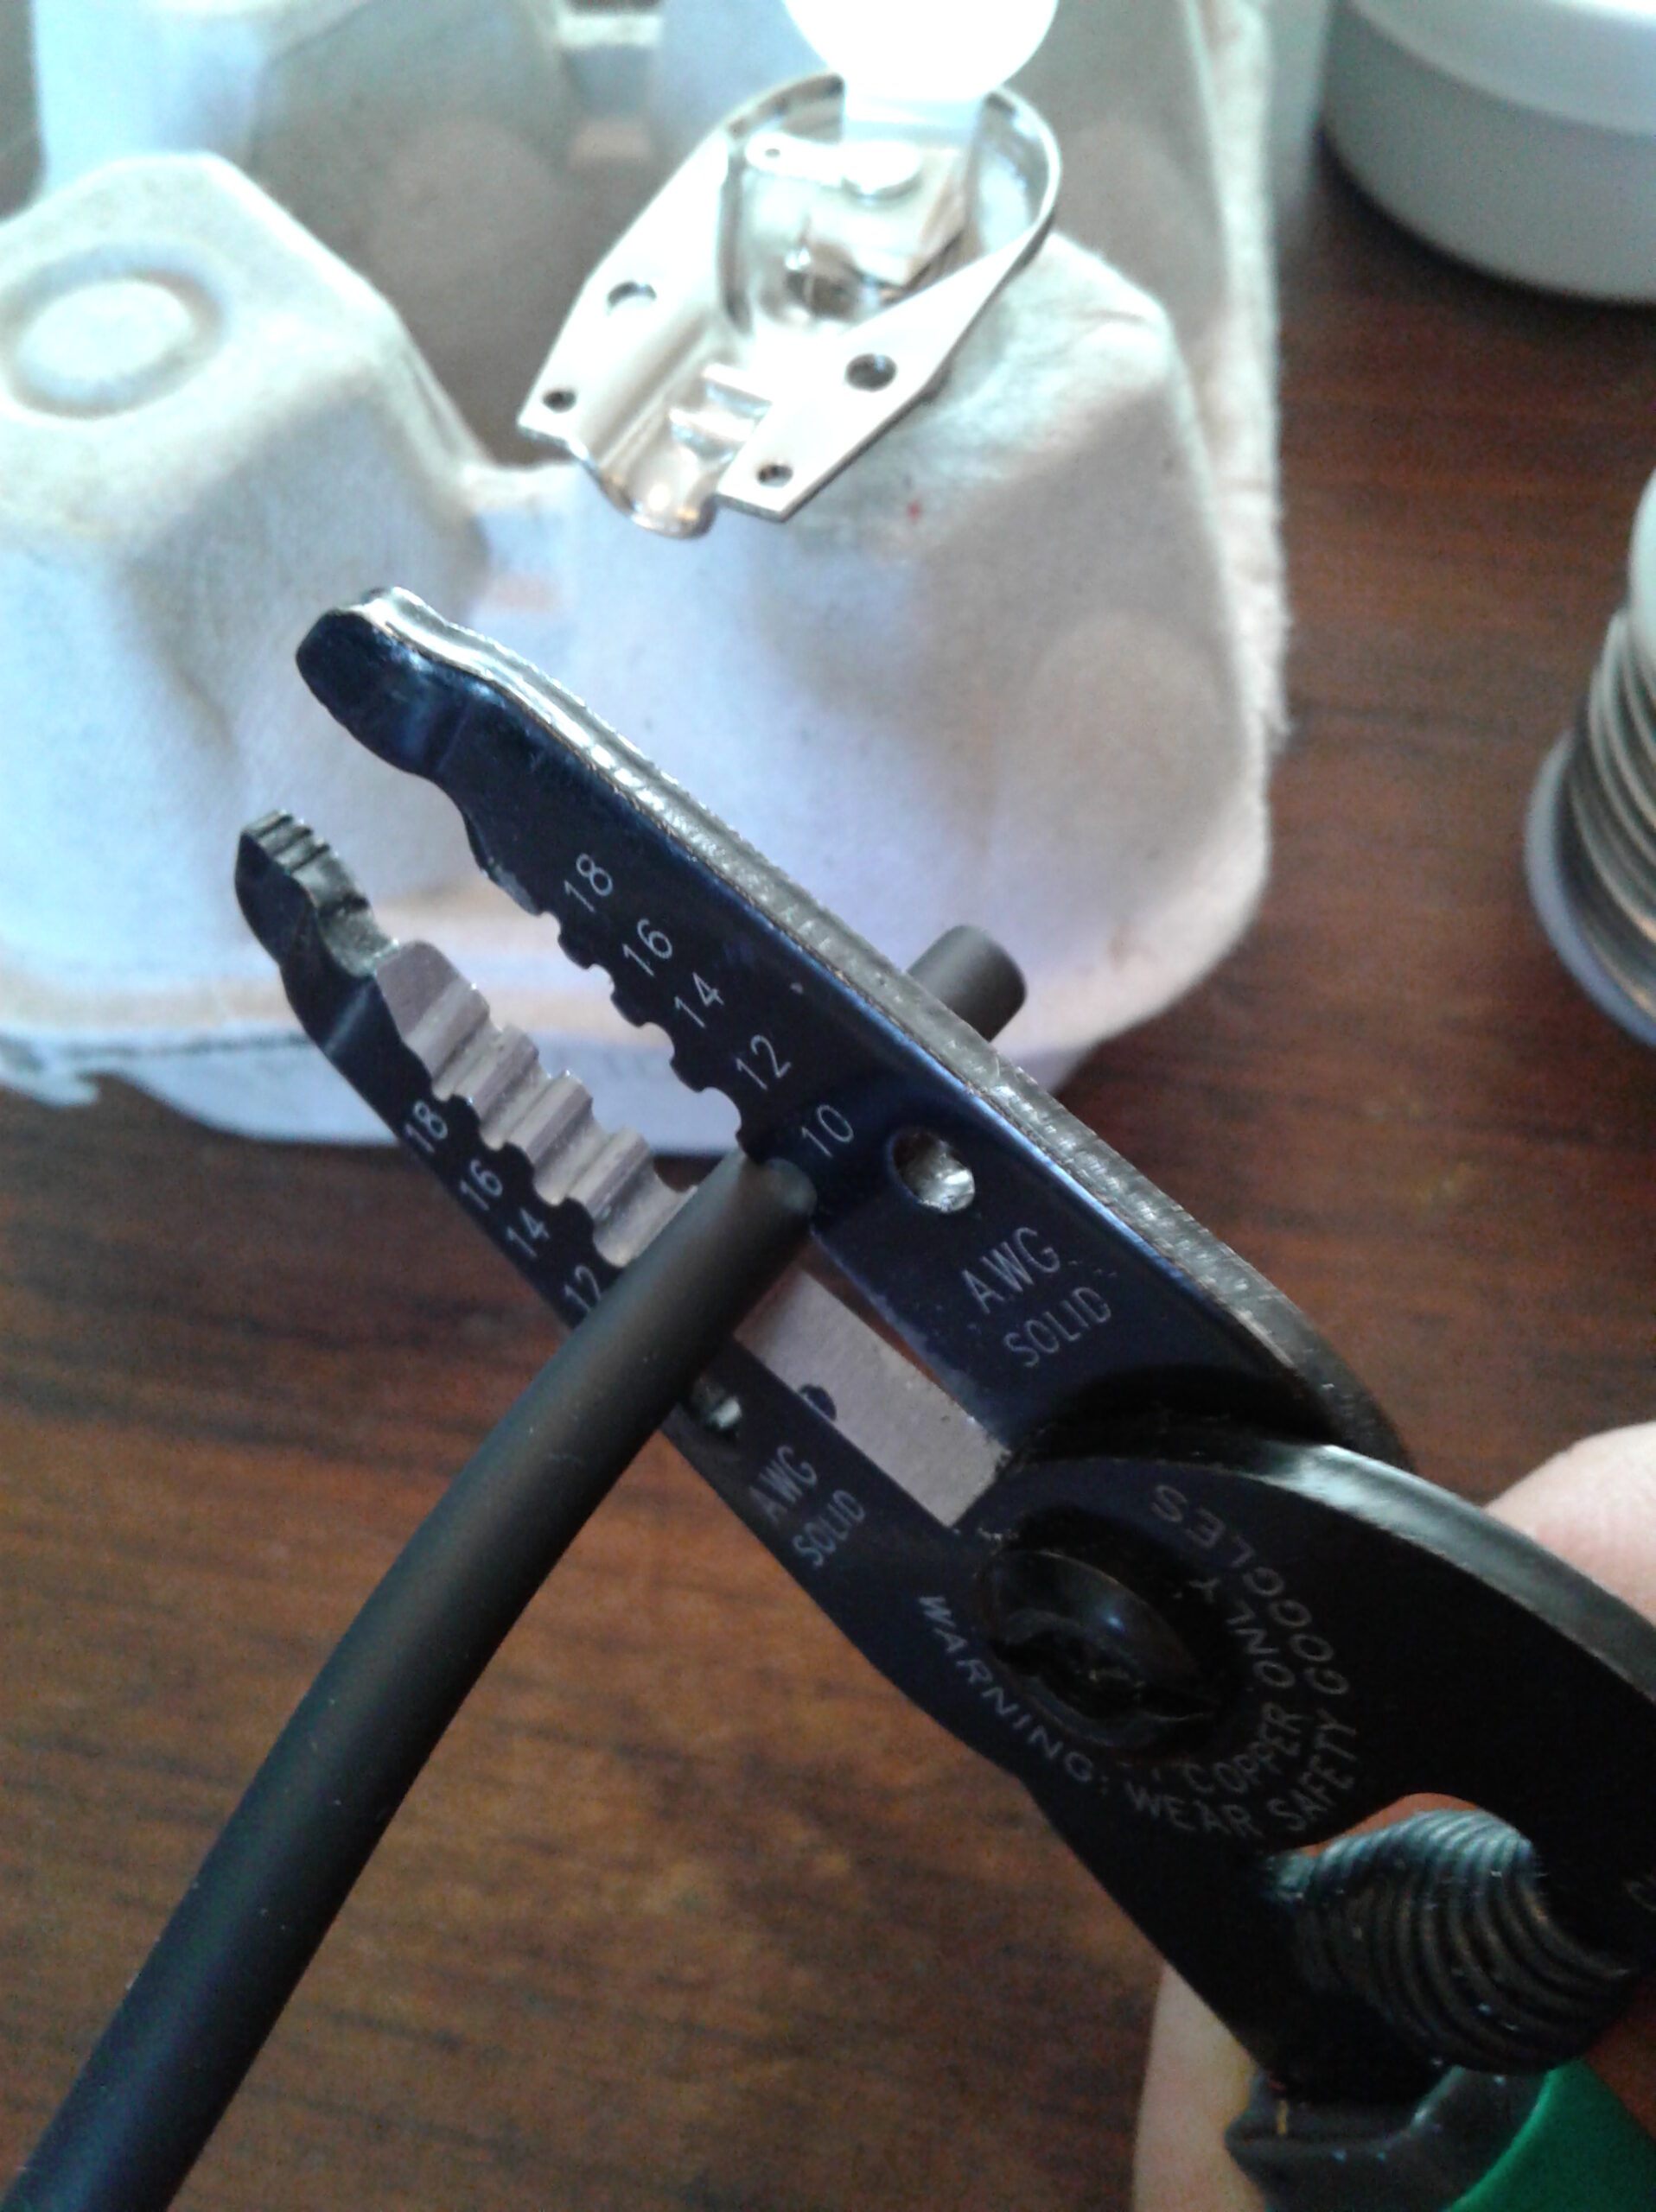
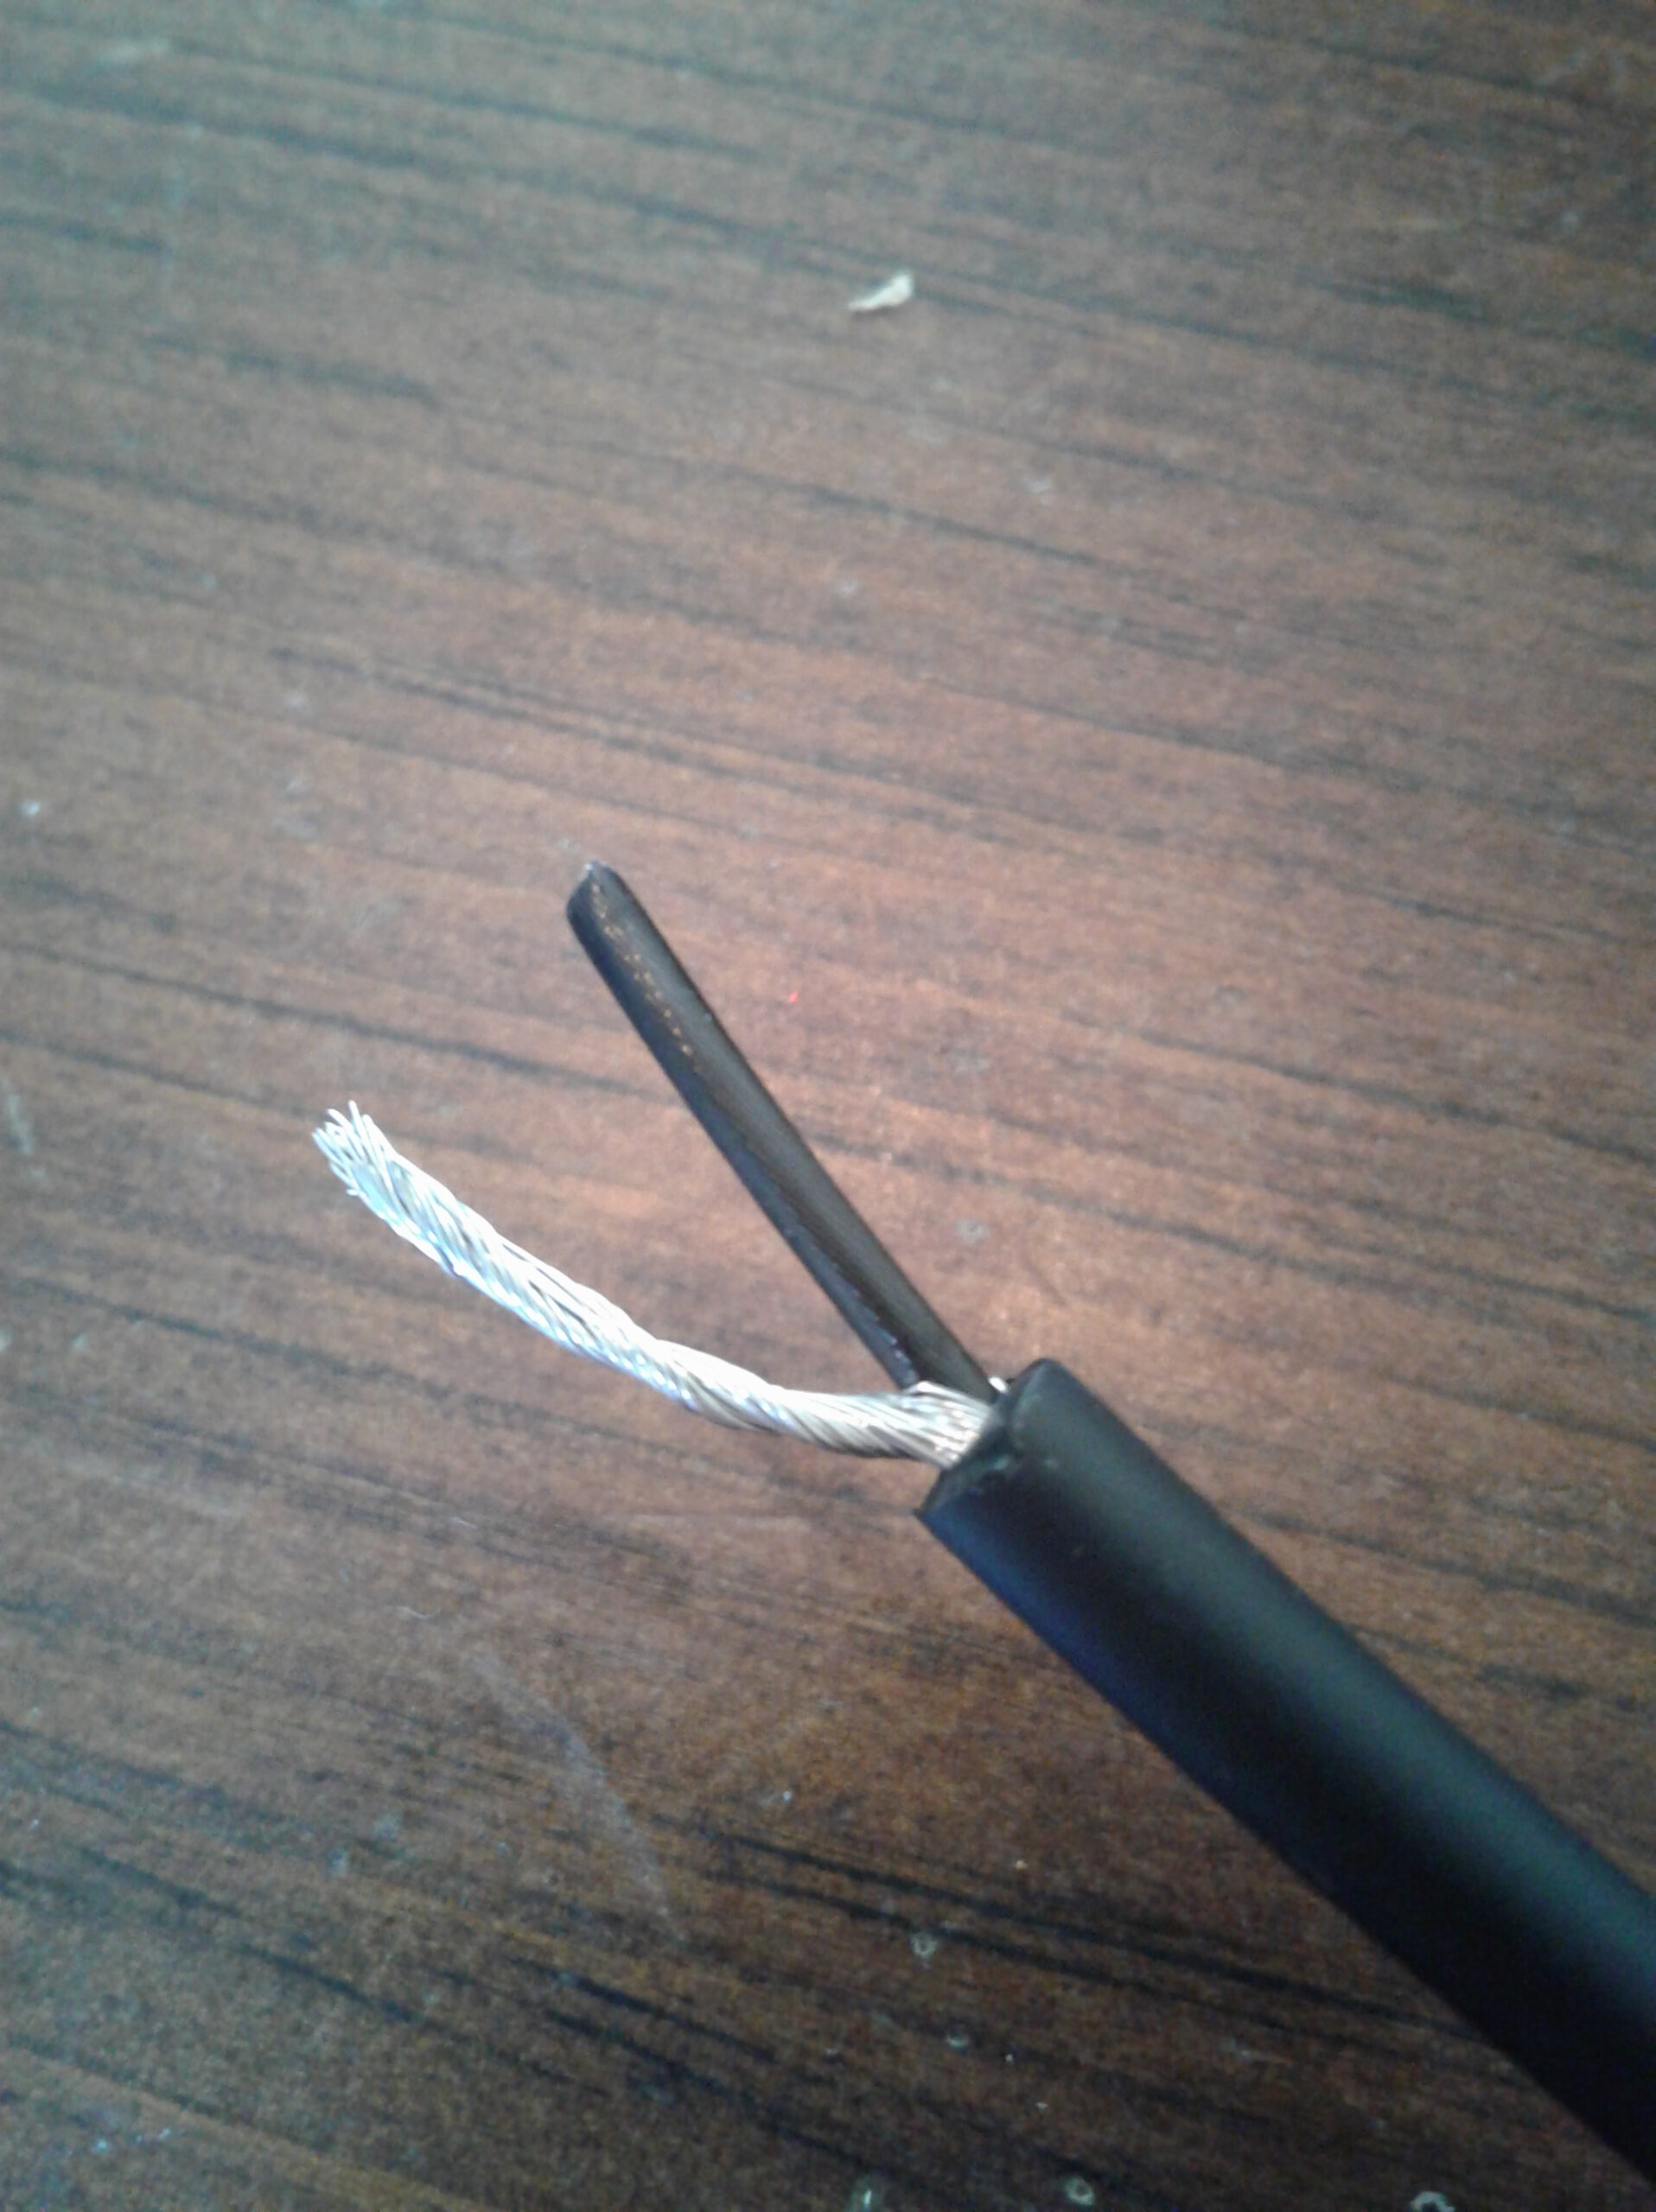
Next you will repeat the process by stripping back the inner layer of the cable. In almost every case you shouldn’t have to strip this section back as far as the outer layer, and in fact it’s better if you don’t so the two layers of wire don’t come into contact. I often only do about a quarter inch on the inner layer. Sometimes you will also need to trim the inner layer to a different length depending on where it attaches to. Once you strip that back you can twist the inner strands together as well.
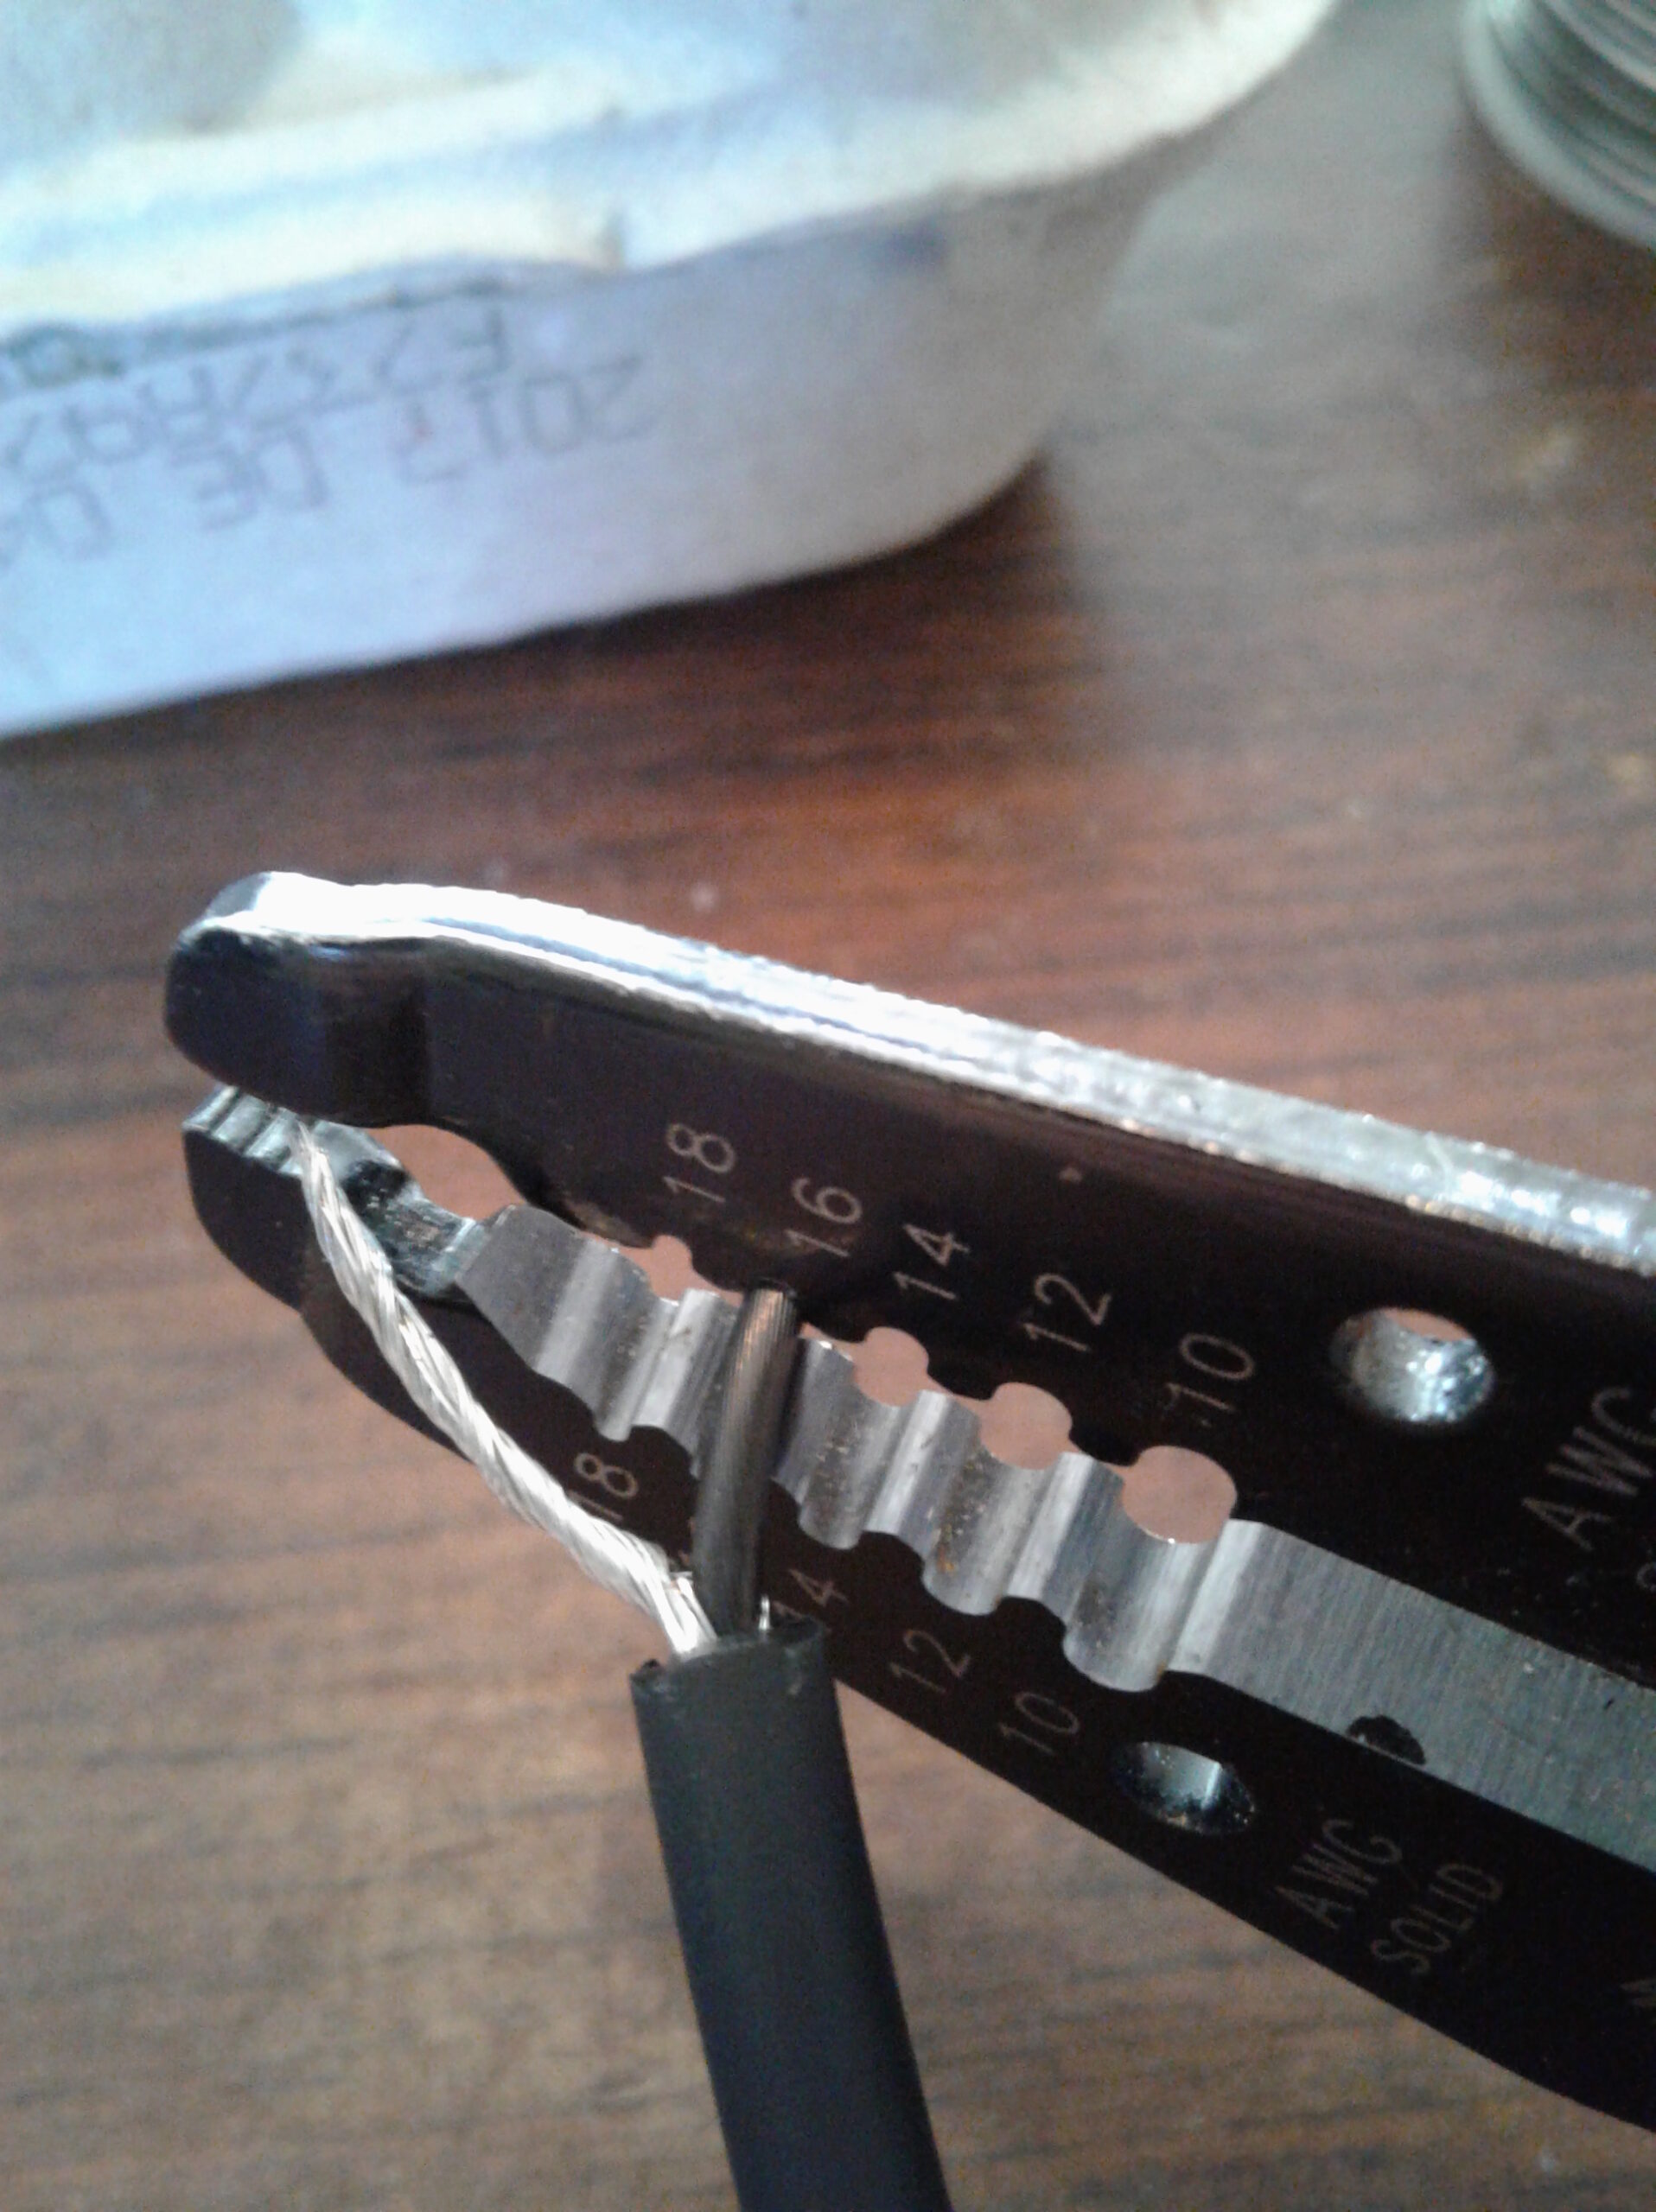
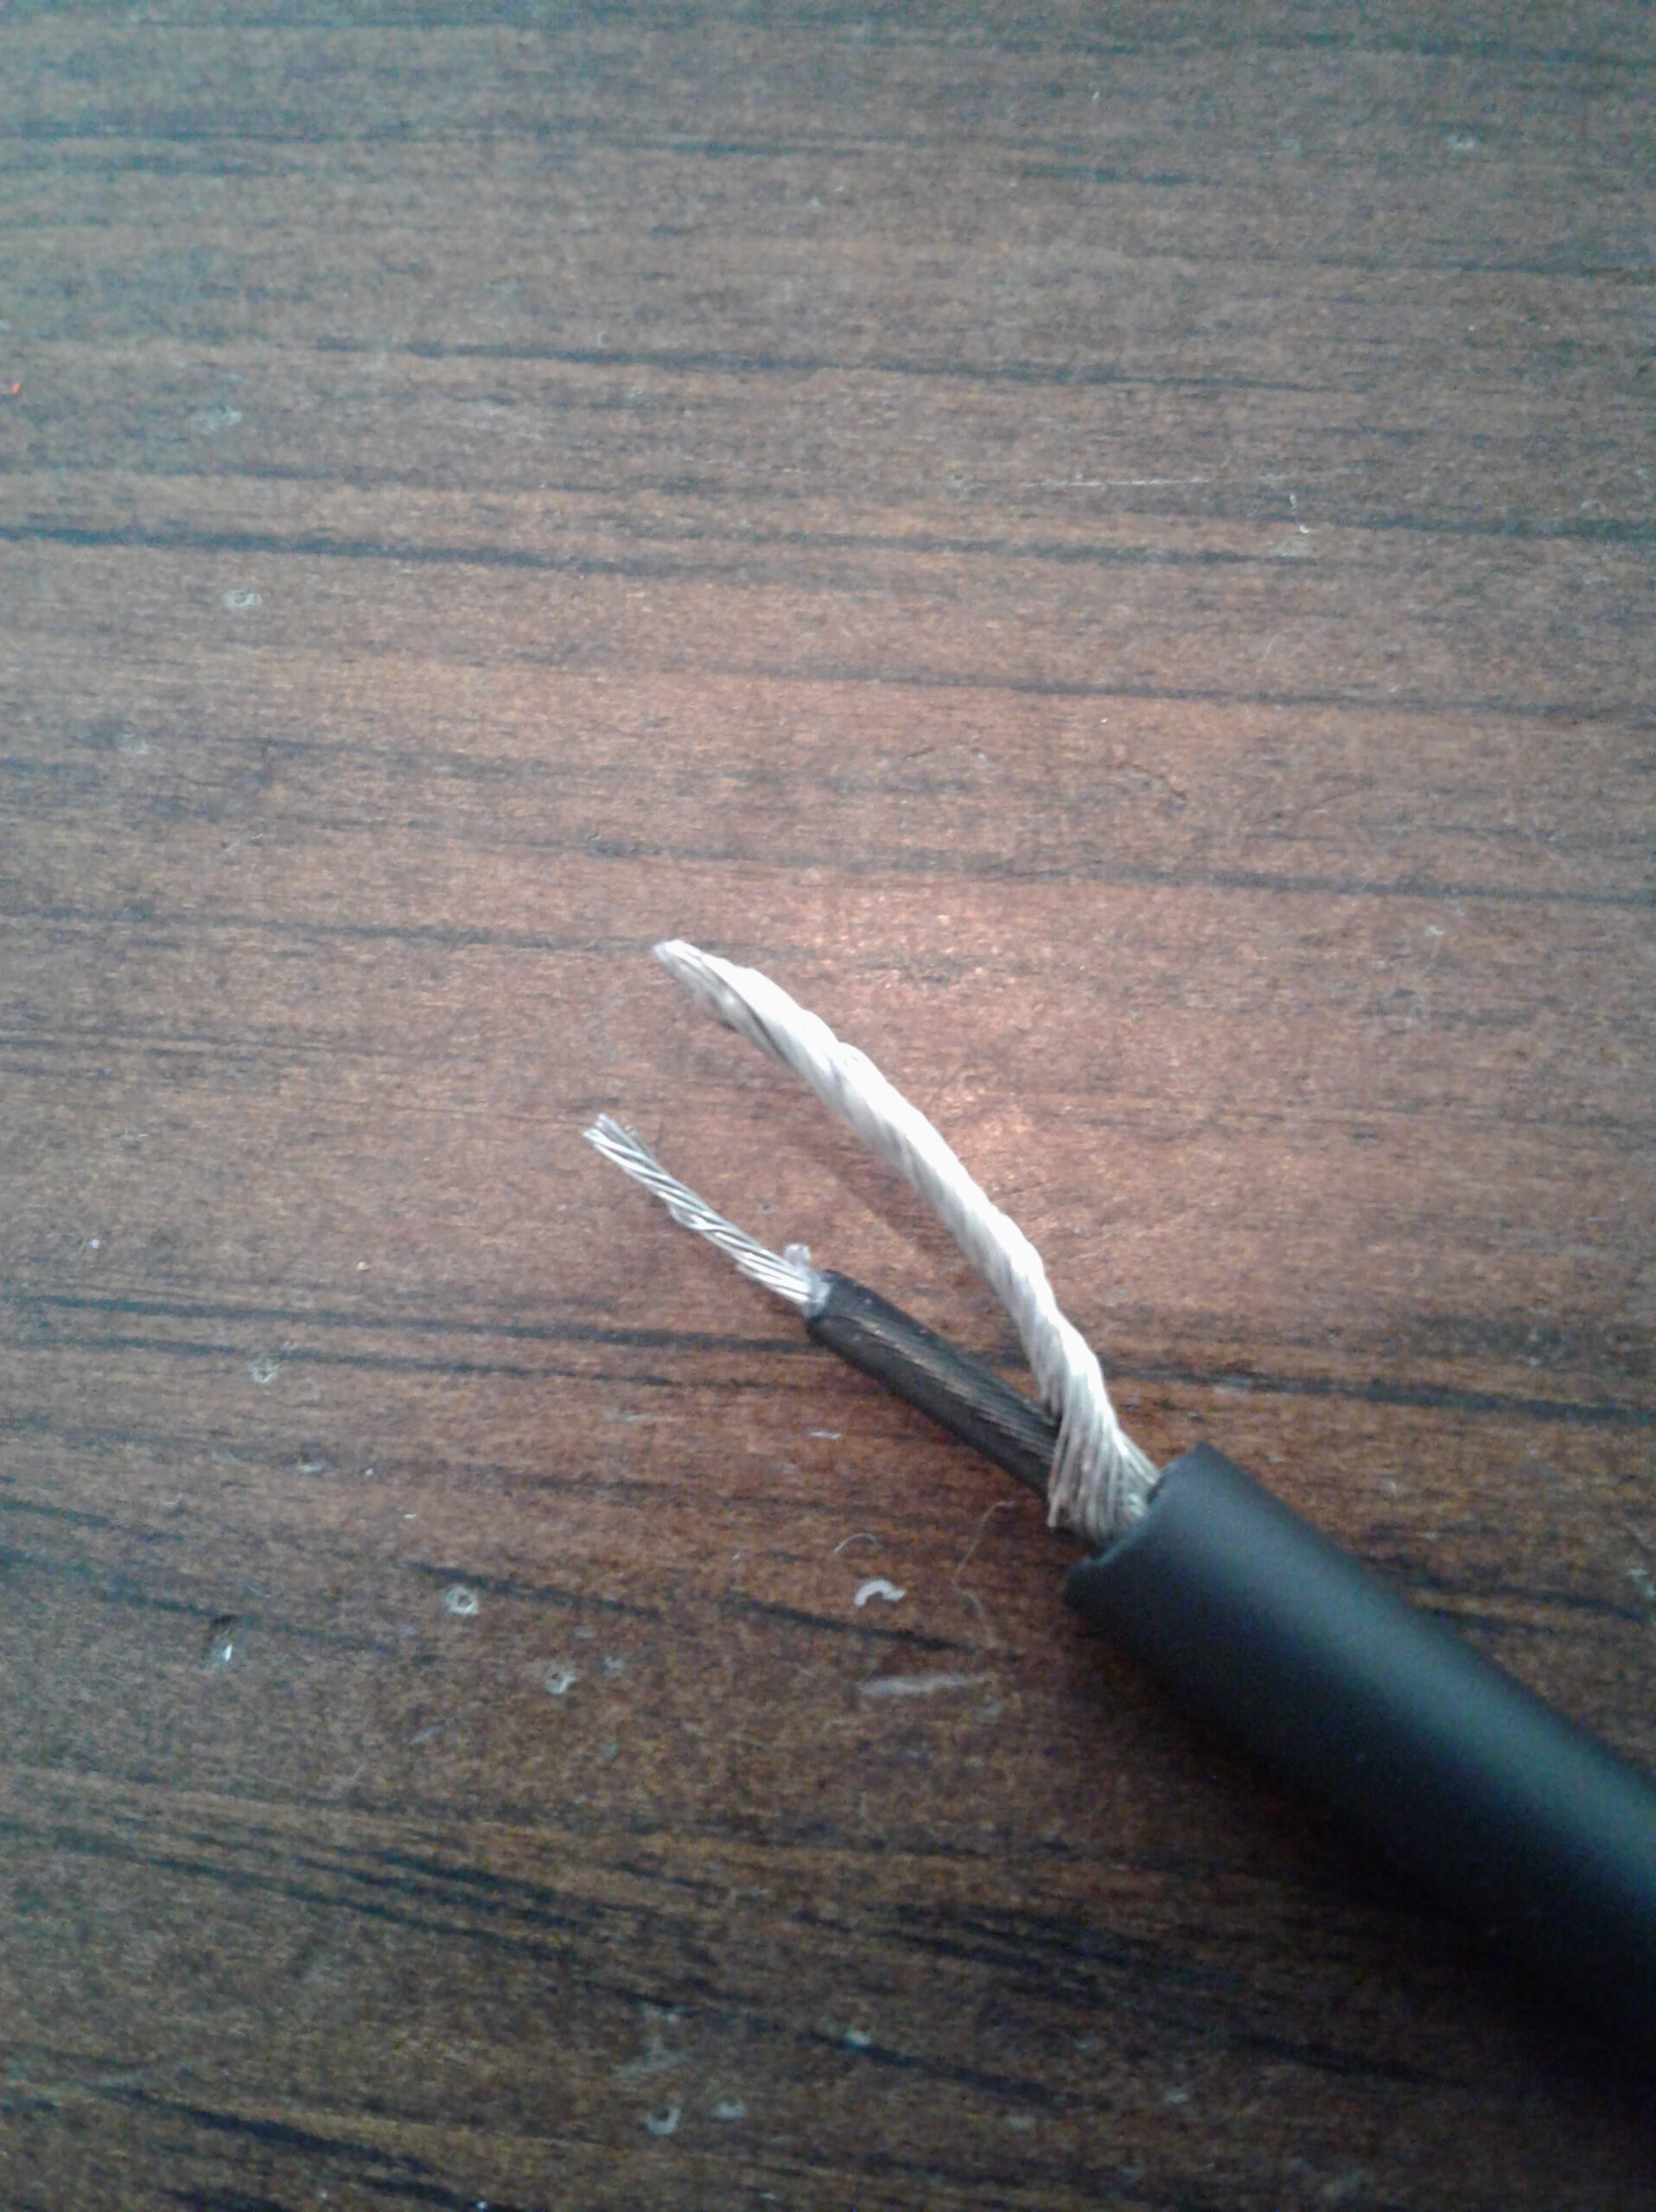
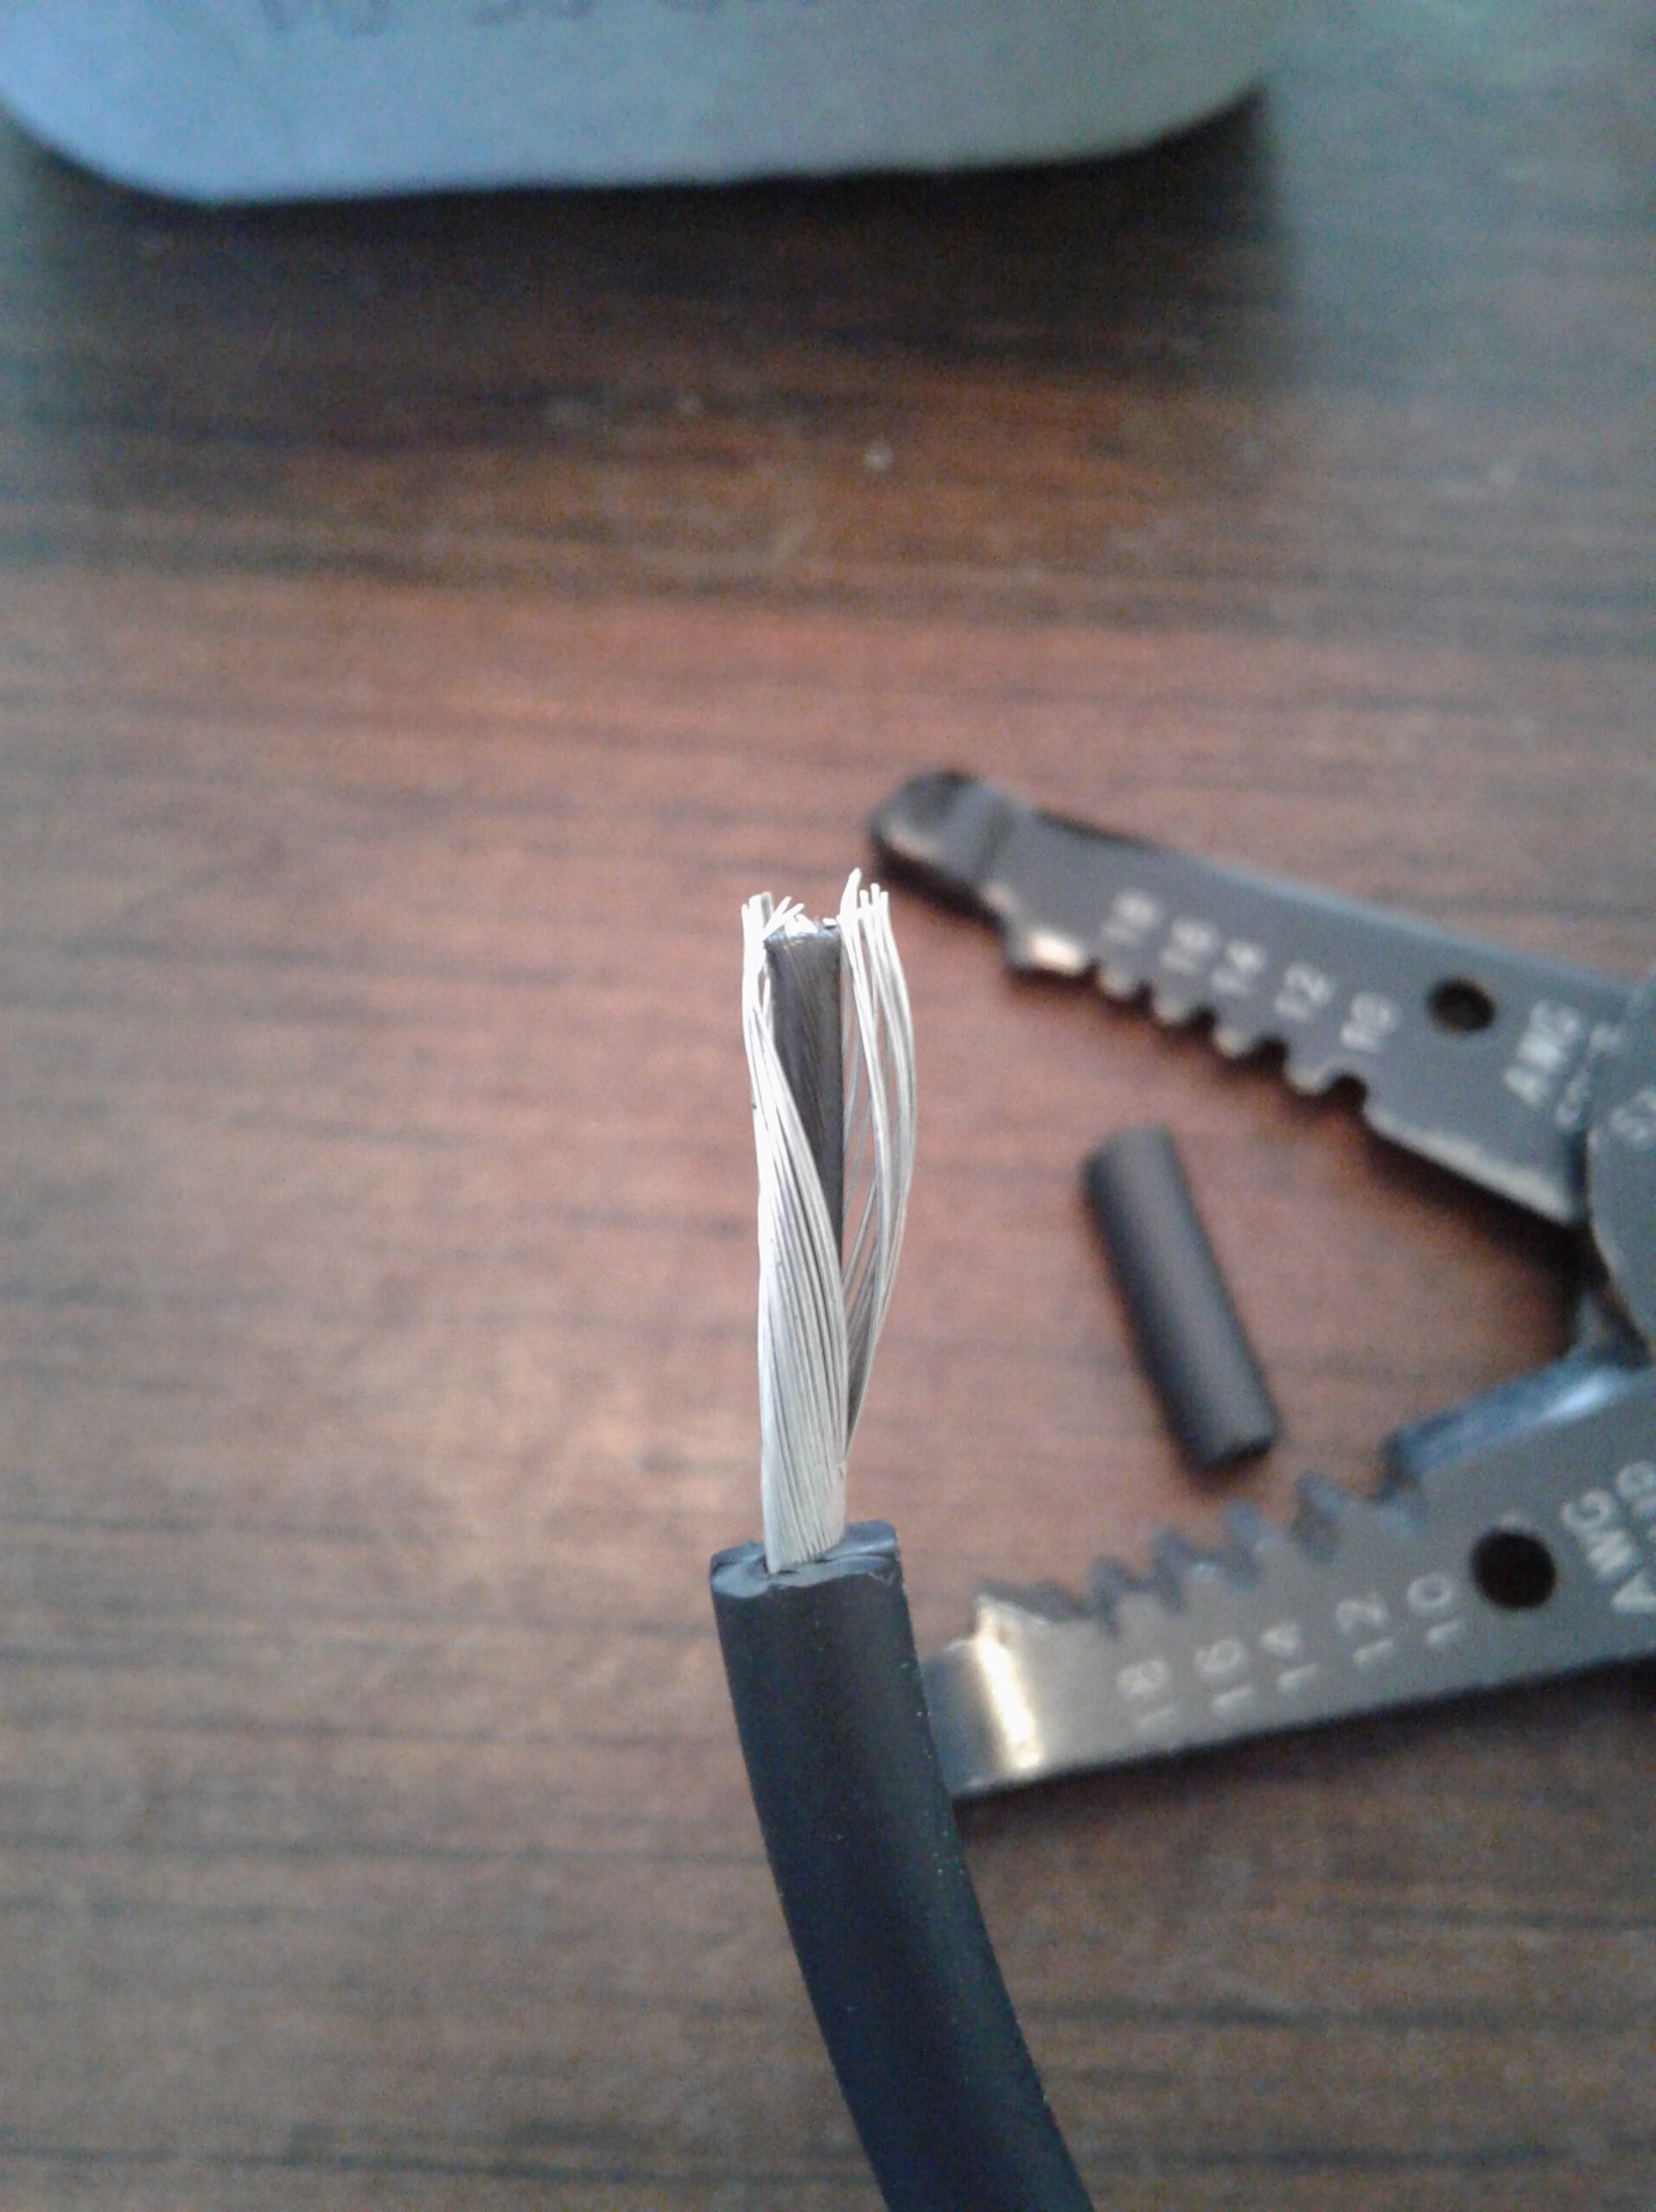
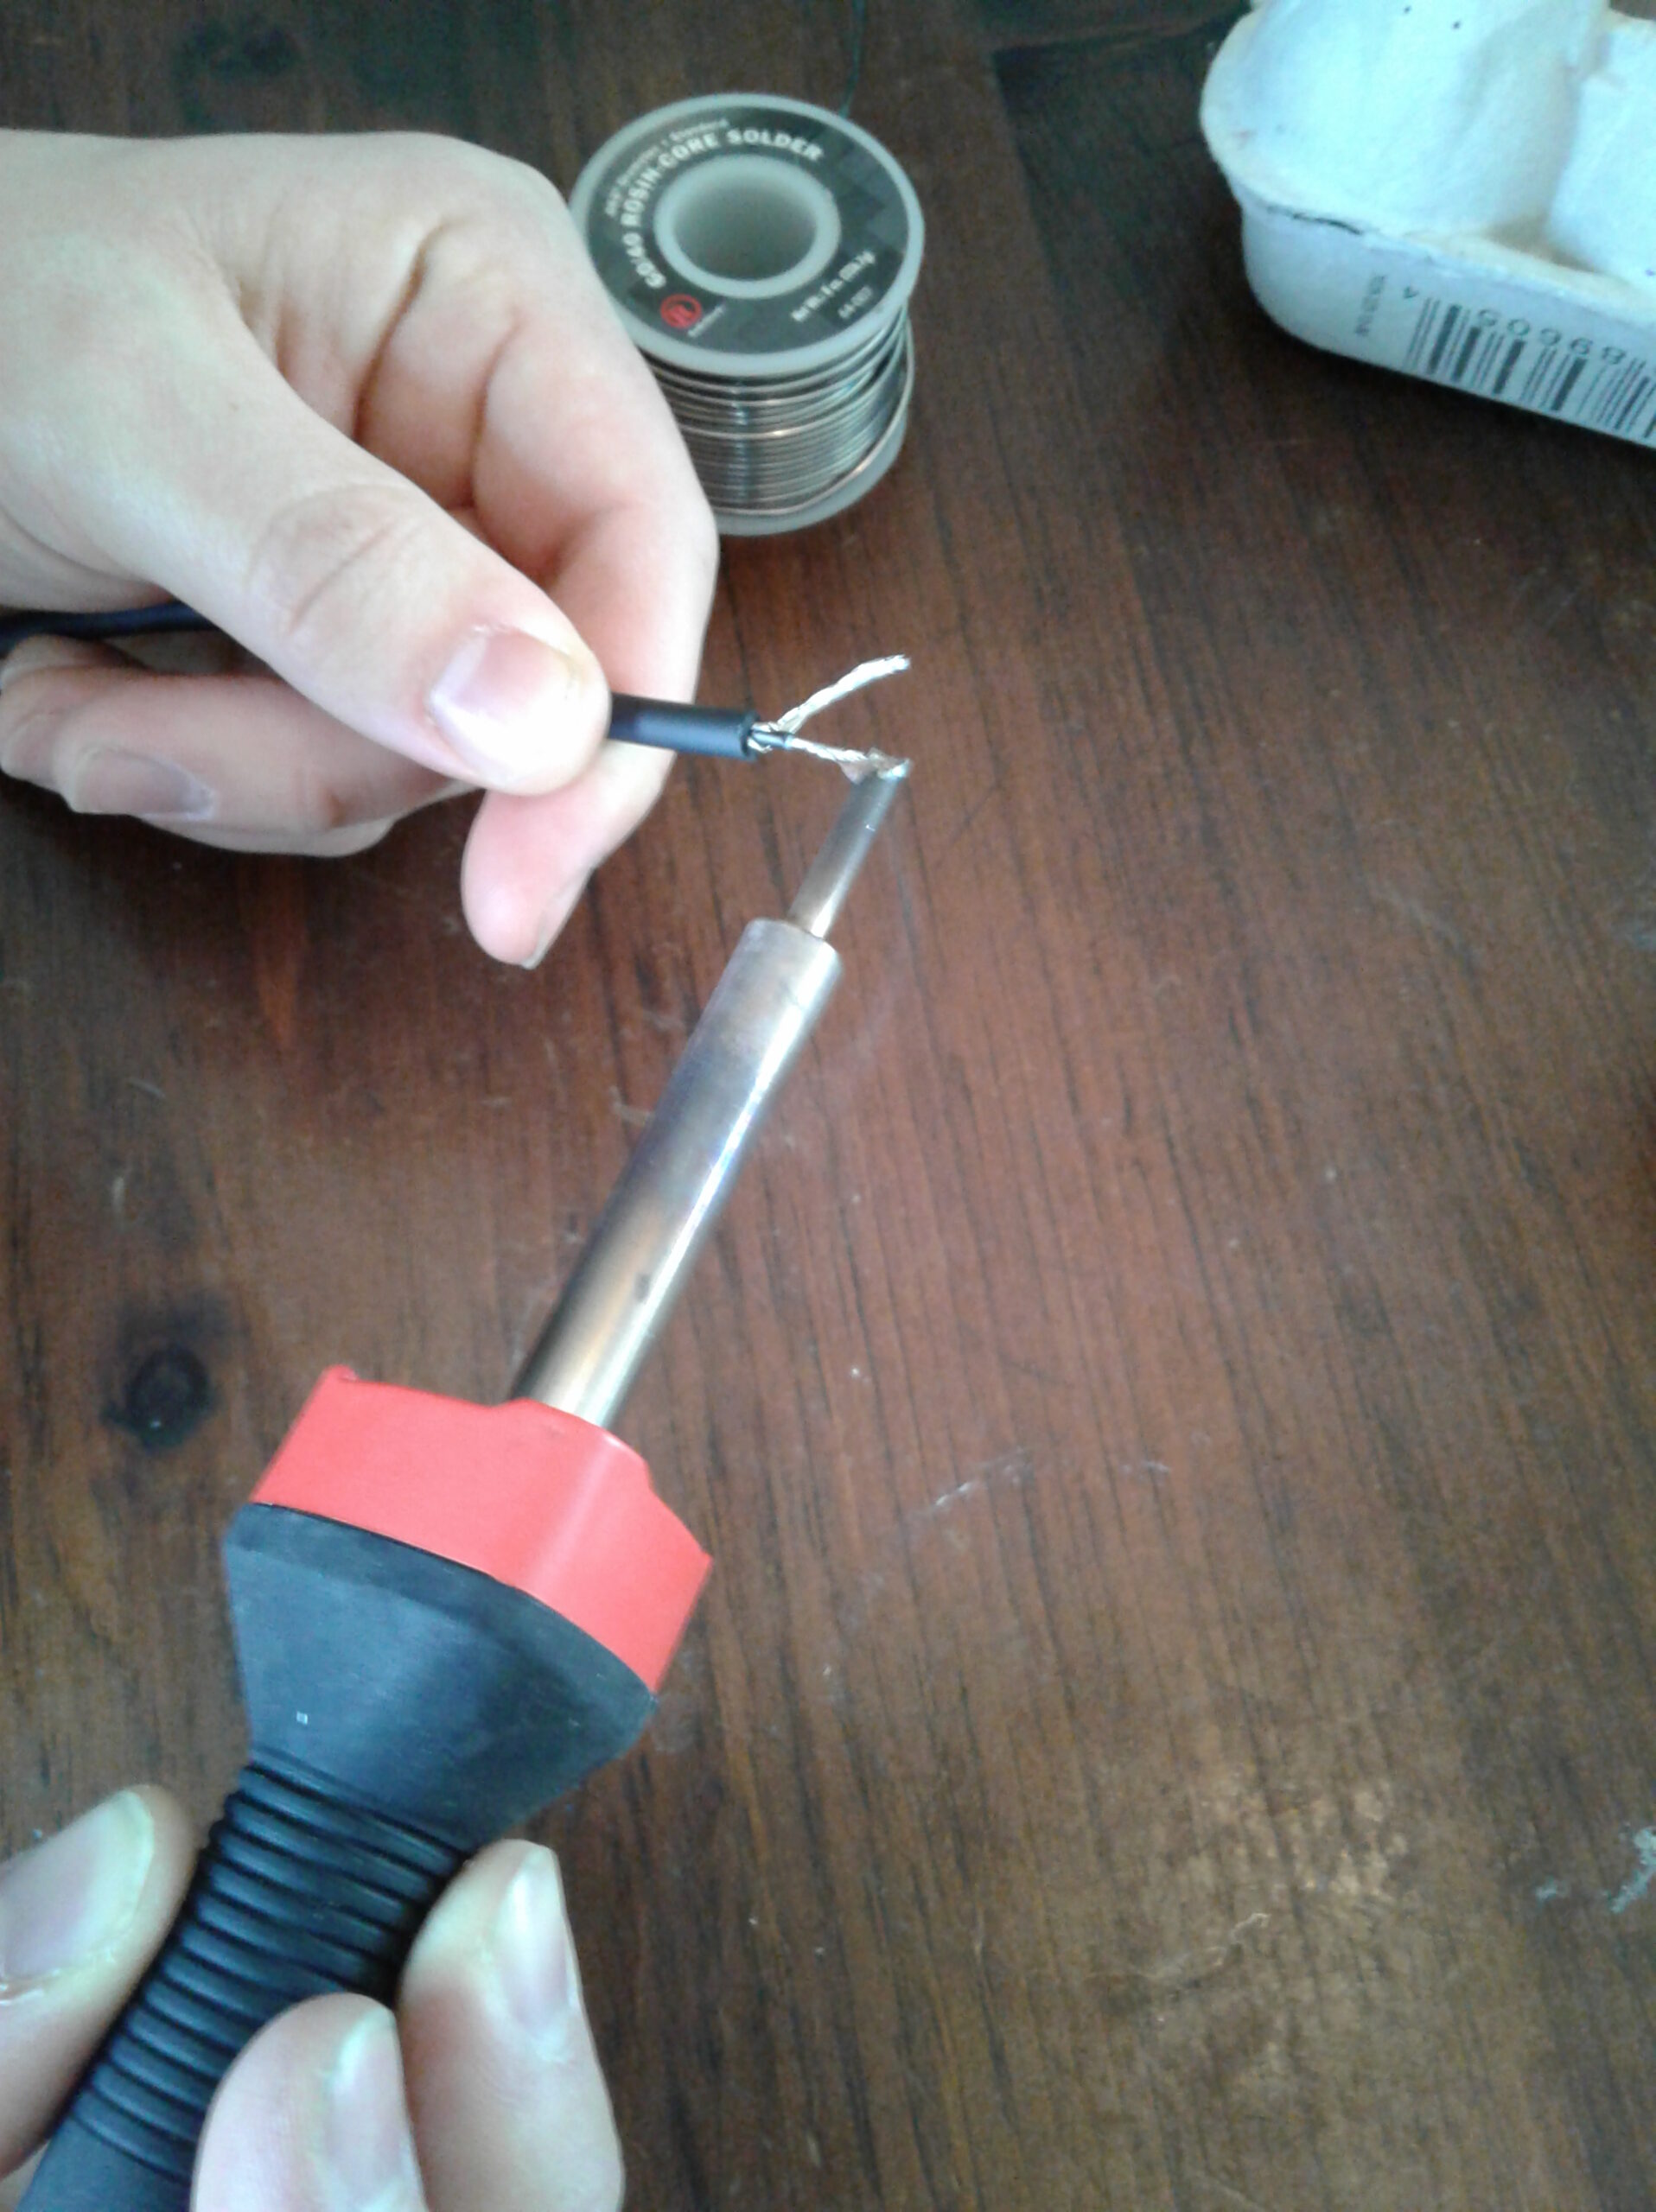
After your cable has been stripped and you’ve twisted the wires into two strands (outer and inner) it is time to tin the wire. Tinning is a process where you lightly coat the wire with some solder to make it easier to get a good solder connection to the plug. It also helps hold all those little wire strands together. You may find it helpful to bend your solder wire up so it’s sticking up in the air from the spool, this way it’s accessible for you without needing another hand.(solder spool bend picture) Now is where the soldering iron comes in. Take your hot soldering iron and touch it to the end of your solder, the solder should travel over to the iron (it likes to follow heat). (solder to solder gun picture) Now take your iron and touch it to the wires that you have prepared to give them a light coat of solder. You will need to move the iron tip along the wire to get the solder to spread. (tinning picture) Another method to tin the wire is to touch the solder wire to the cable and then touch the cable to the soldering iron. With this method the heat from the iron will draw the solder onto the cable. When you are done tinning you will see that your wire is shiny and that all the little strands are now sealed within the solder.
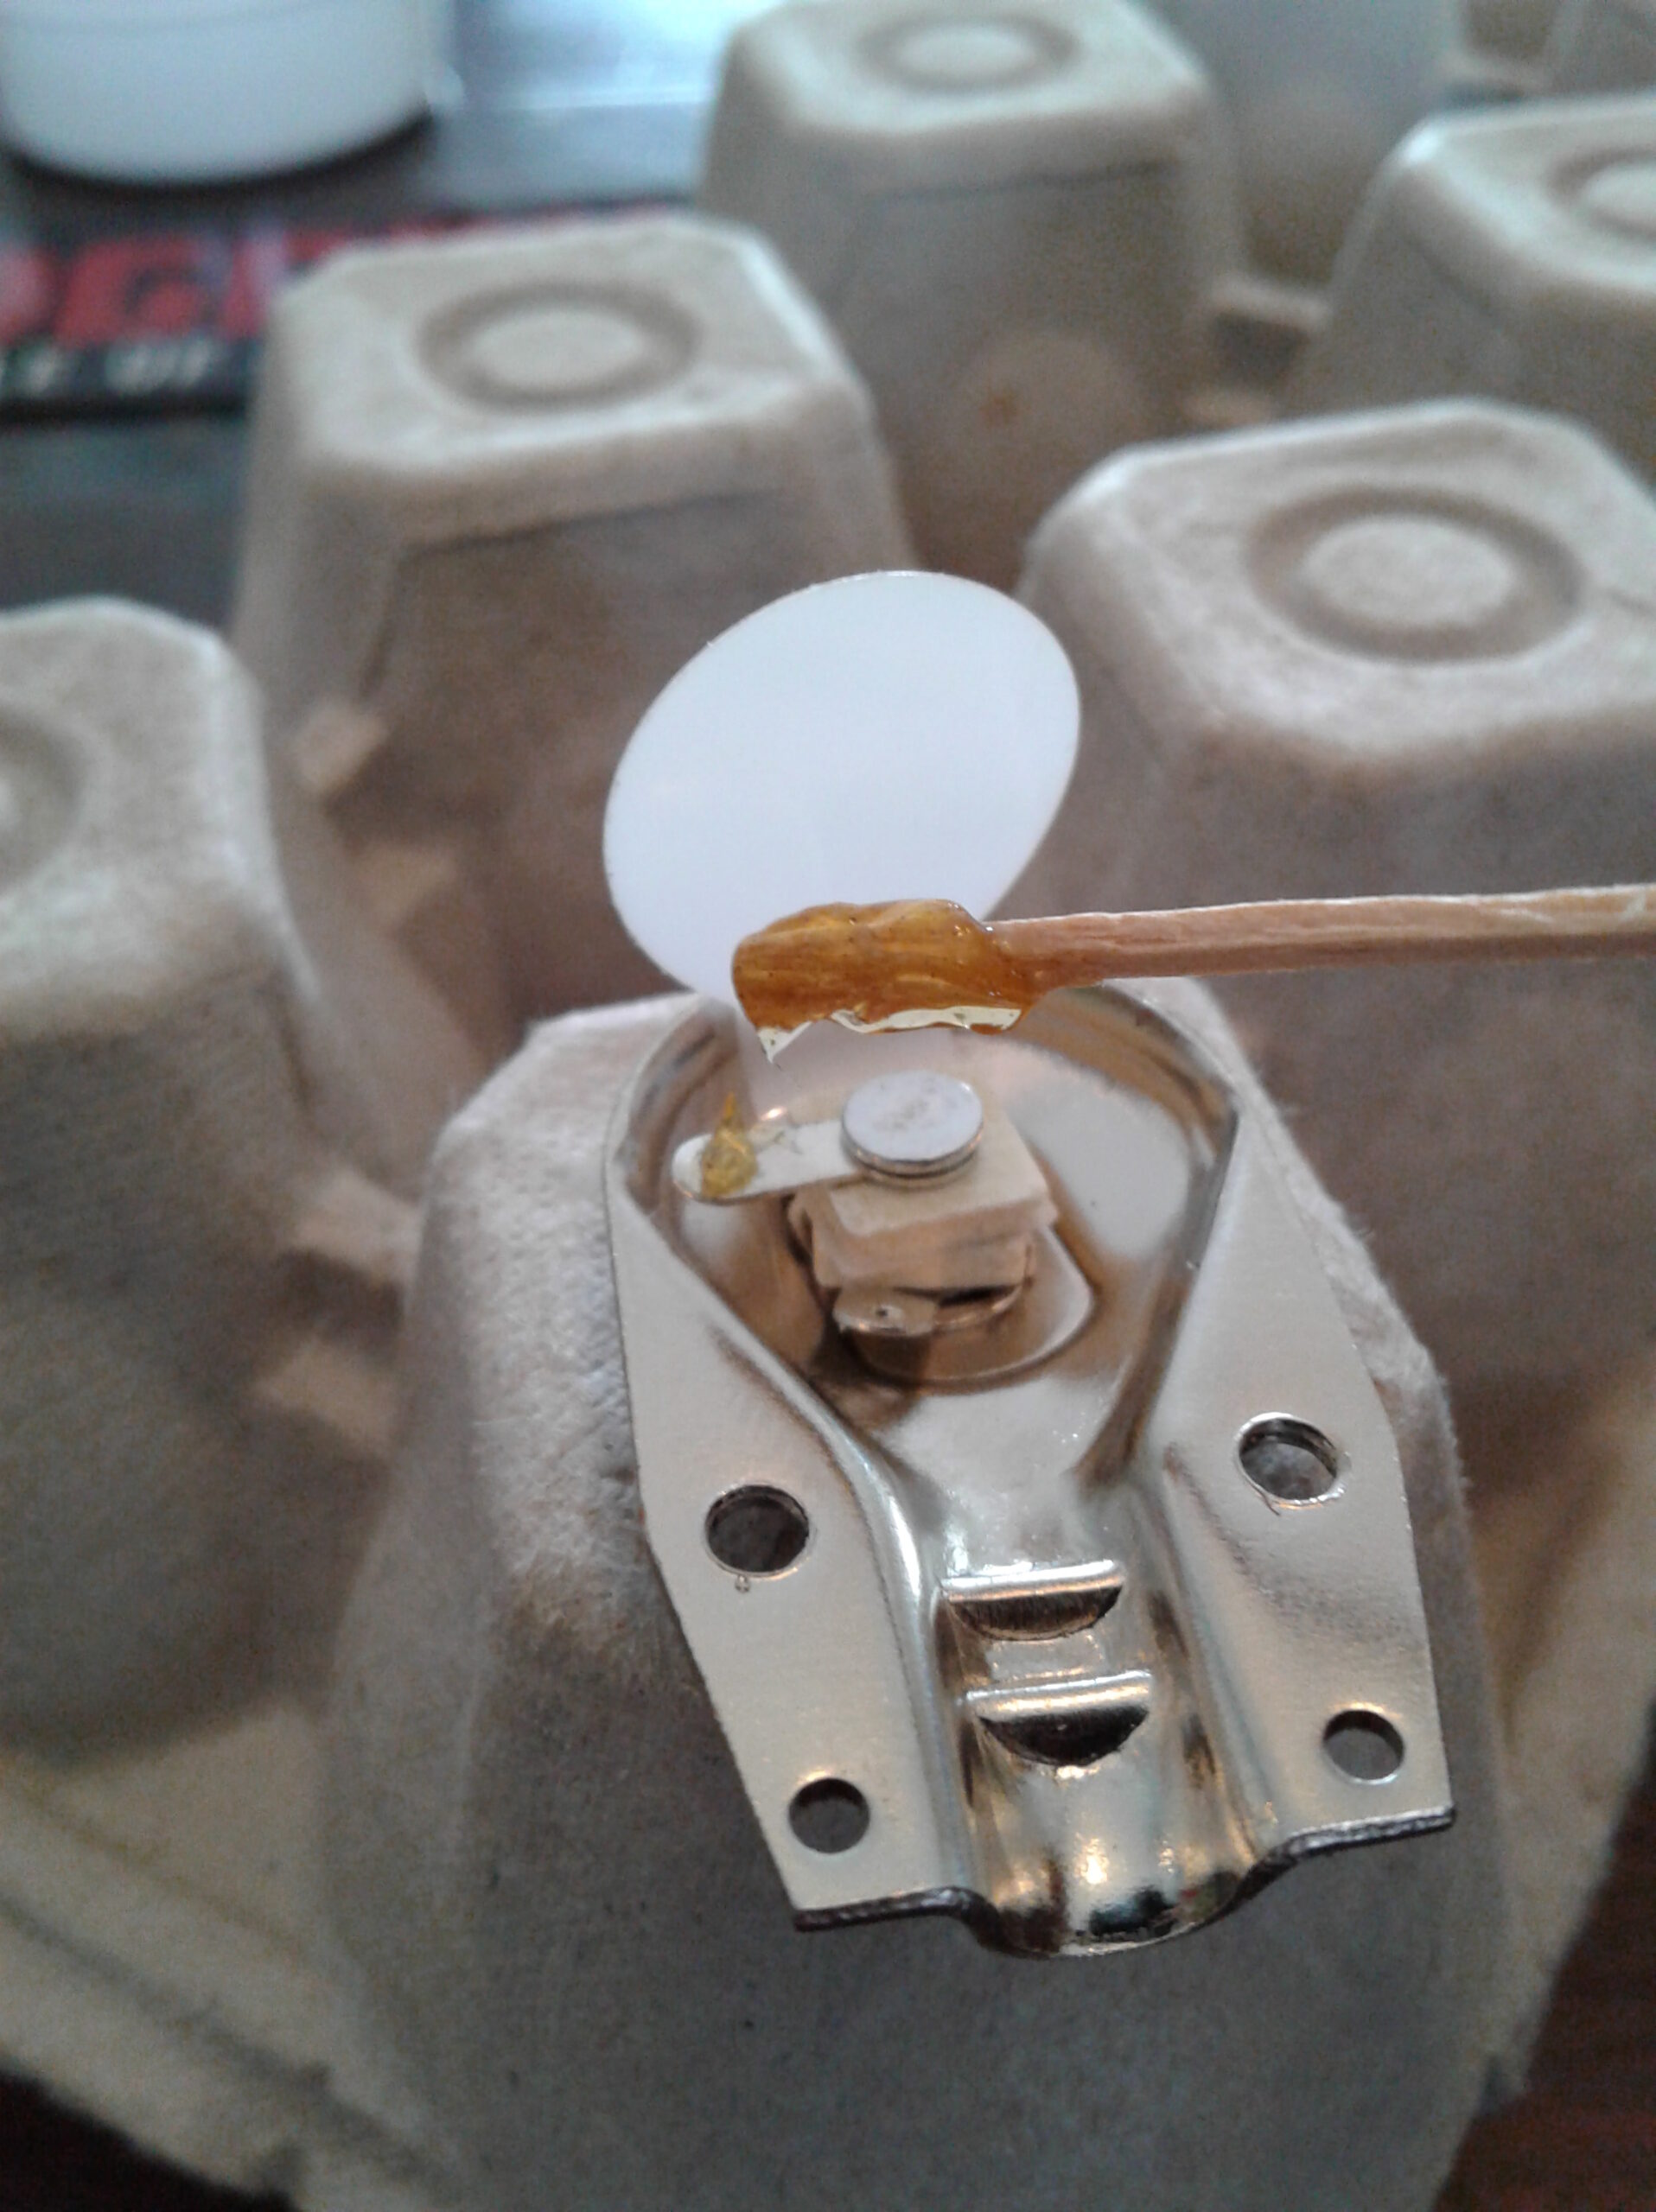
The last step in the prep is to ready your plug for solder. If you haven’t opened it up already, go ahead and do that. I usually take a bit of Flux and apply it to each of the two terminals on the plug. Now you’re ready! (flux picture)
Connecting the Cable to the Plug
Now that your prep work is done it’s time to connect the ground and hot center wires to their respective terminals on the plug. This is a simple and quick process. Double check that your cable ends match up well with the terminals on the plug. I find it helpful to use something like an old egg carton to hold my plug for this, as you’ll see in some of my photos.
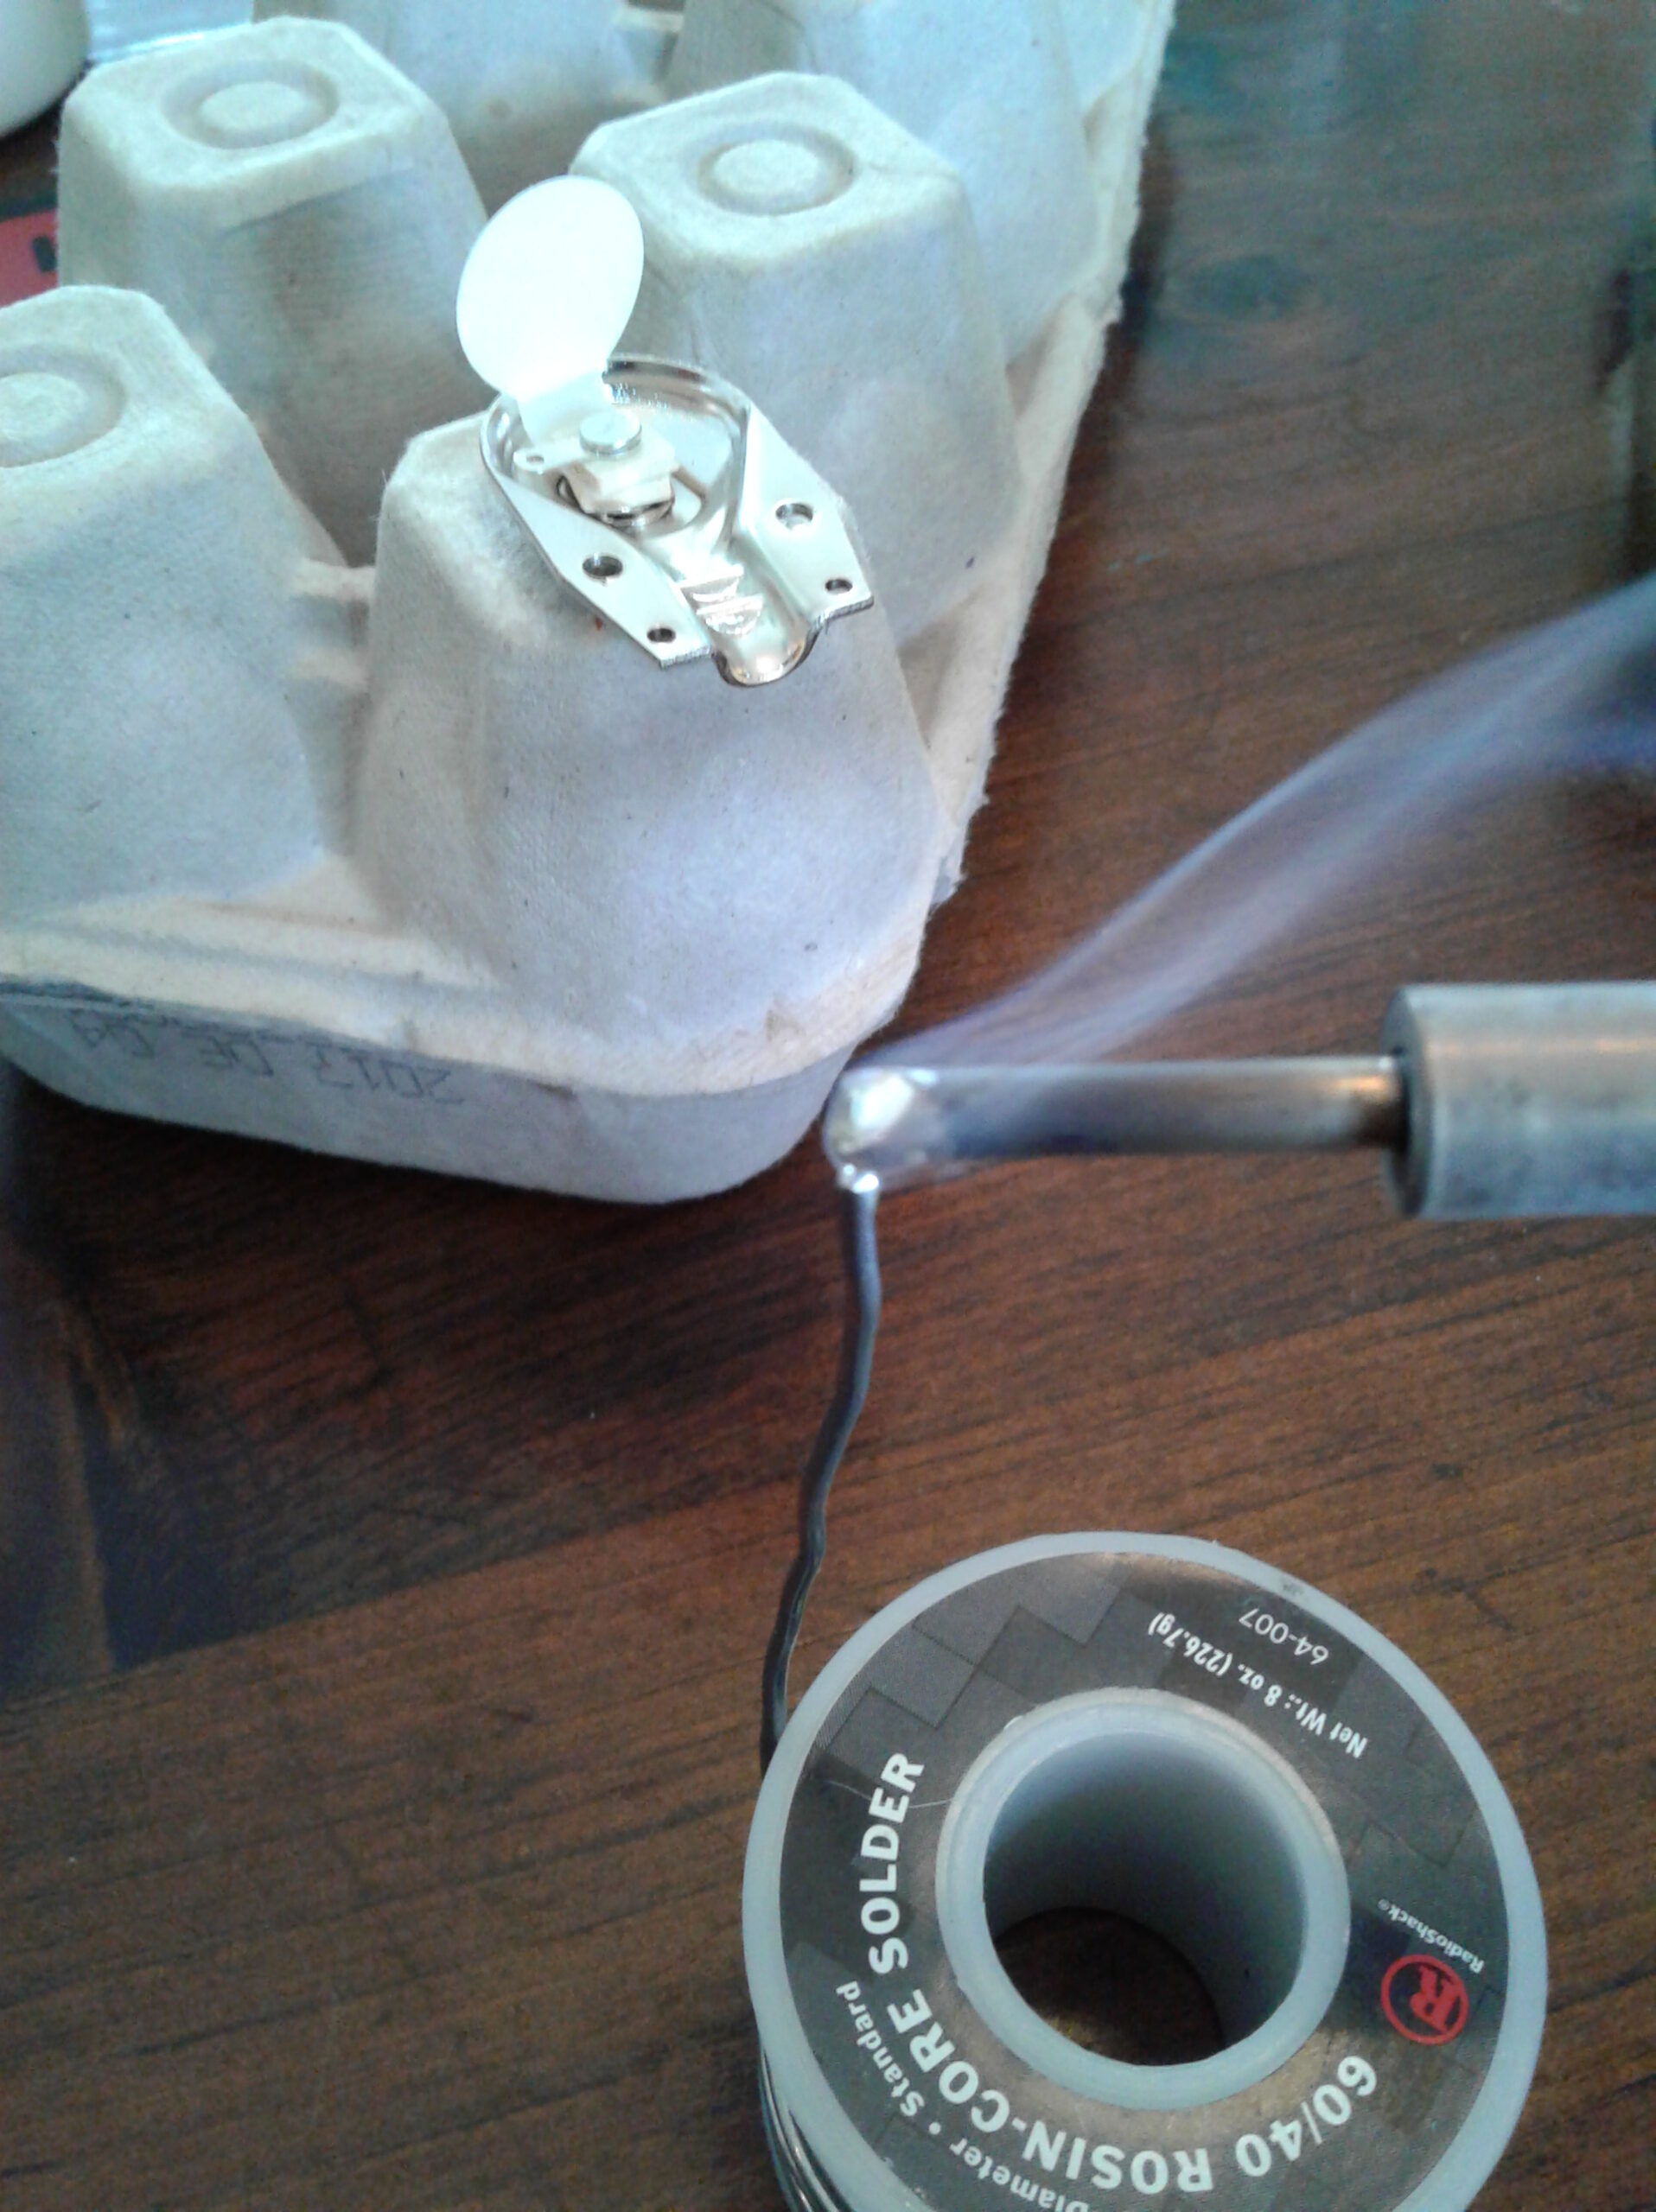
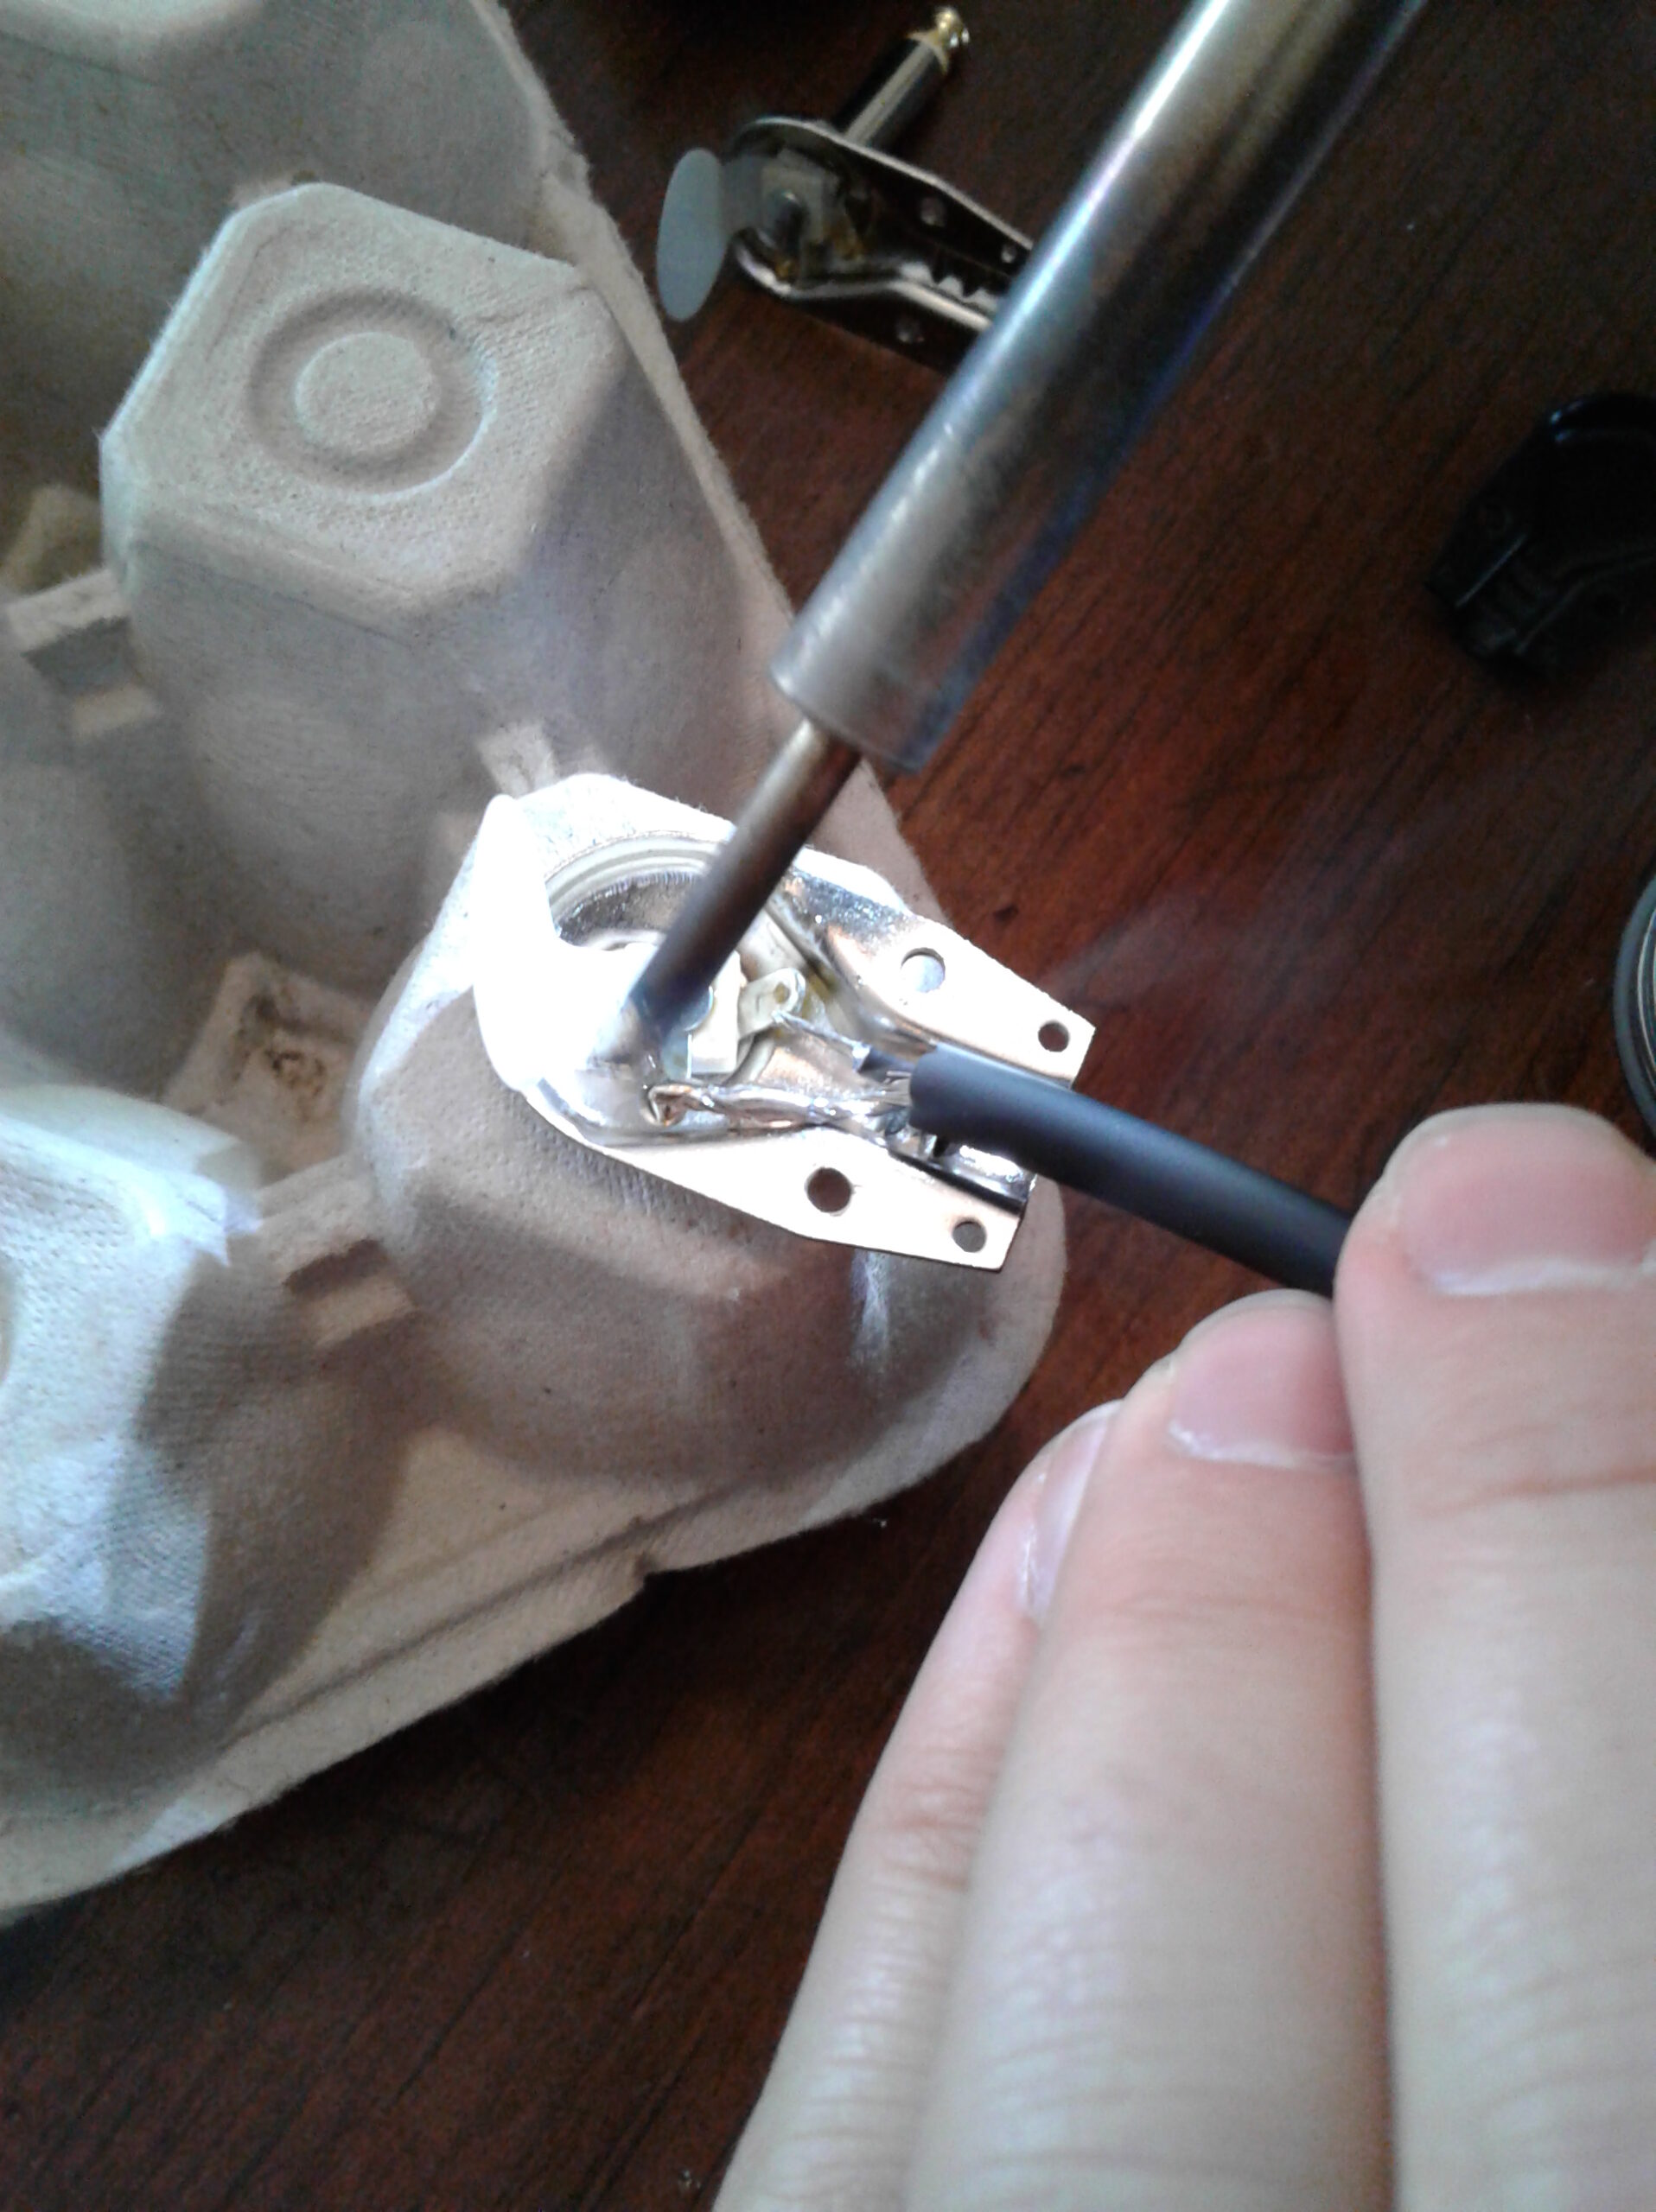
Now touch the tip of your soldering iron to your solder wire, allowing the solder to transfer onto the iron. Then, place your patch cable wire ends on each of the respective terminals (outer ground wire on the ground terminal and inner hot wire on its terminal) and apply the tip of your soldering iron to one of the wires and it’s terminal simultaneously. Soldering pic It should only take a couple of seconds for the solder to move off of the iron onto the terminal and to create a nice little dab of solder to hold the wire to the terminal. Repeat this step for the second wire and terminal. Give your plug a little time to cool before handing (typically only 30 seconds or so is needed as the solder cools quickly).
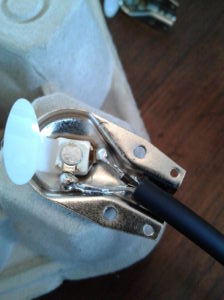
Hey, you did it! At this point it’s your choice if you want to slide some heat shrink on the wire or not. If you want heat shrink make sure you slide it on now before cutting and preparing the second end of your cable. You can repeat the steps above for the other end of your cable and once you are done you will have completed your very own patch cable!
As a note I recommend cleaning off the soldering iron tip between each step by wiping it on your damp sponge or wire cleaner. I typically clean it after tinning and again after connecting the wires to their terminals.
Conclusion
I hope this has helped you out and that you’ve been able to learn something. As I’ve mentioned before, learning to solder has saved me all kinds of money over the last few years. I can custom wire an entire pedalboard in an evening. I can fix up or swap out a faulty switch or pot on a guitar in just a few minutes. It’s a handy skill to have and I’ve found that the minimal investment of a decent soldering iron and tools has well paid for itself over time.